¶ Shopify Settings for KSA E-invoicing
This guide will walk you through the initial Shopify setup required to start selling in Saudi Arabia. These steps are essential before integrating with the Marnin platform for e-invoicing. We will cover:
- Adding and activating a new market for KSA.
- Setting up shipping zones.
- Configuring tax rates.
- Setting the store currency.
- Choosing between tax-inclusive or tax-exclusive product listings.
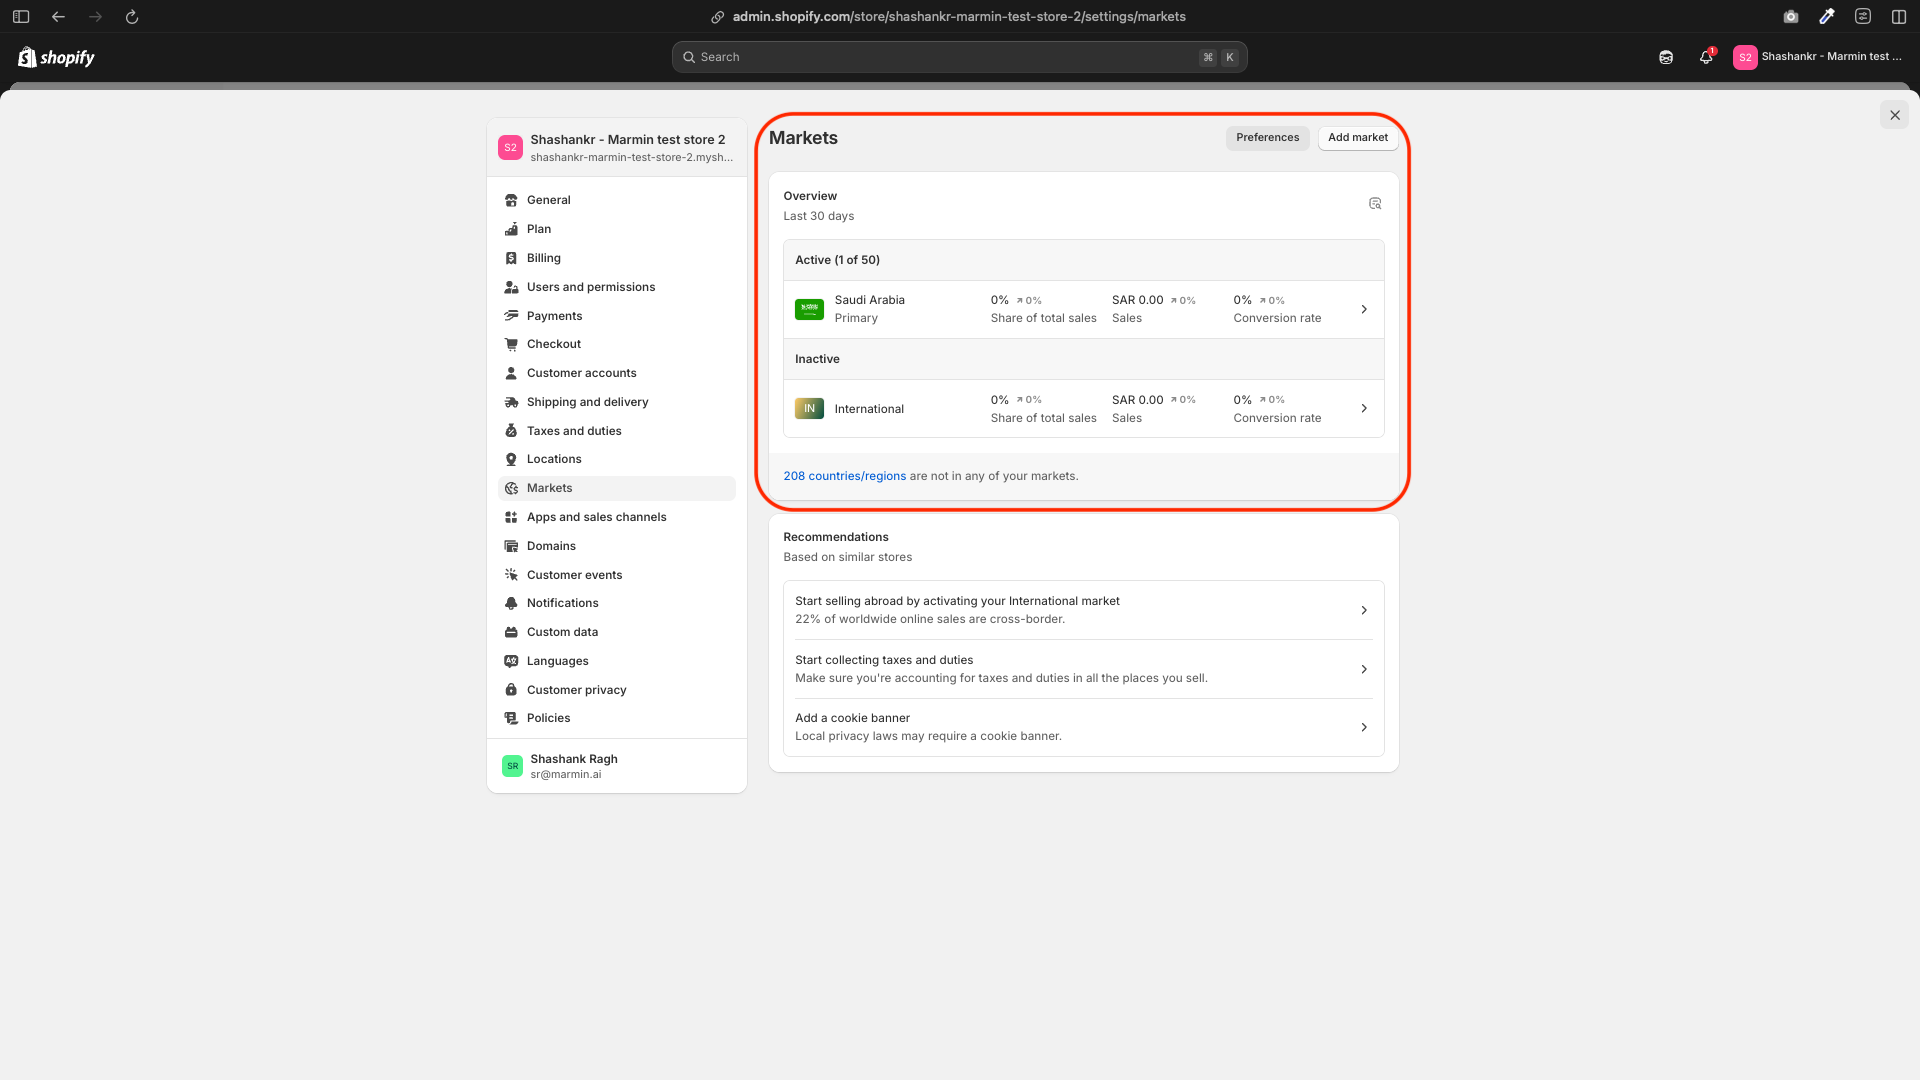
¶ 1. Adding a New Market for Saudi Arabia
¶ 1.1 Add Saudi Arabia as a Market
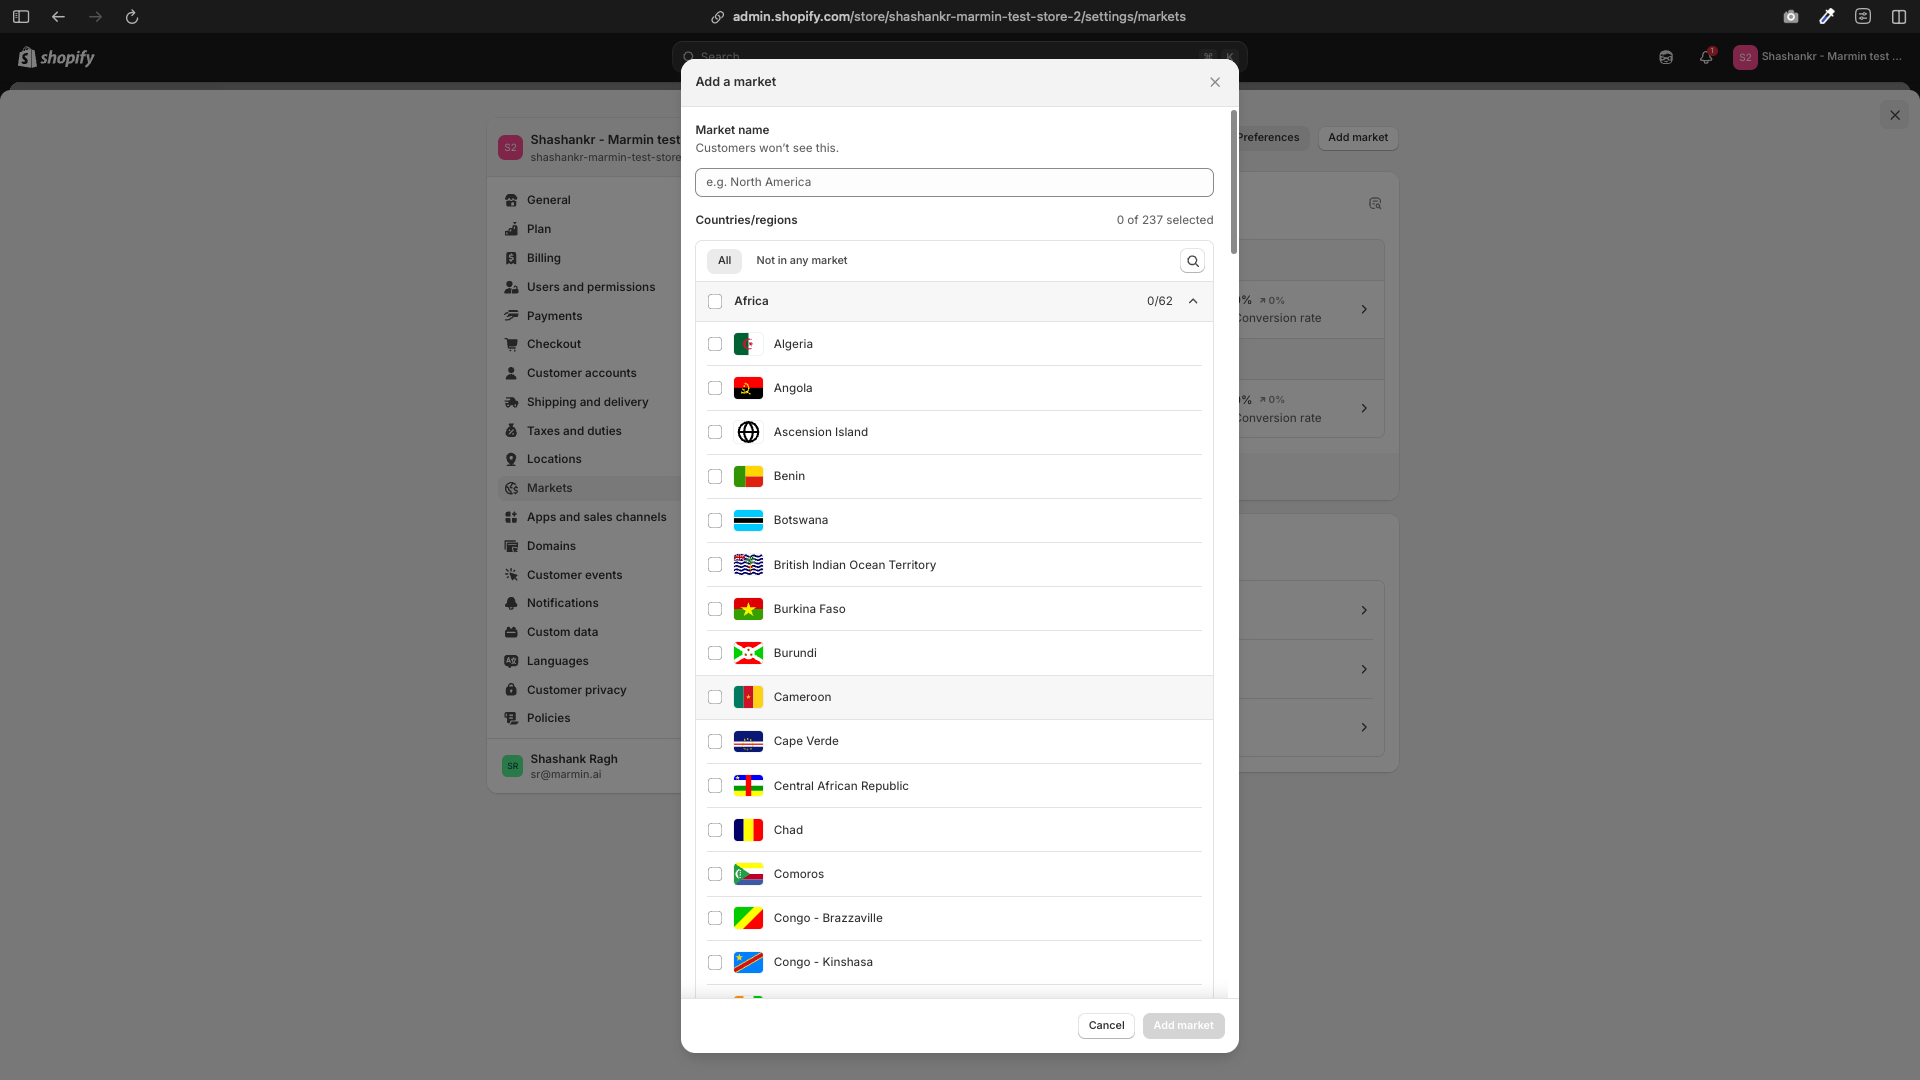
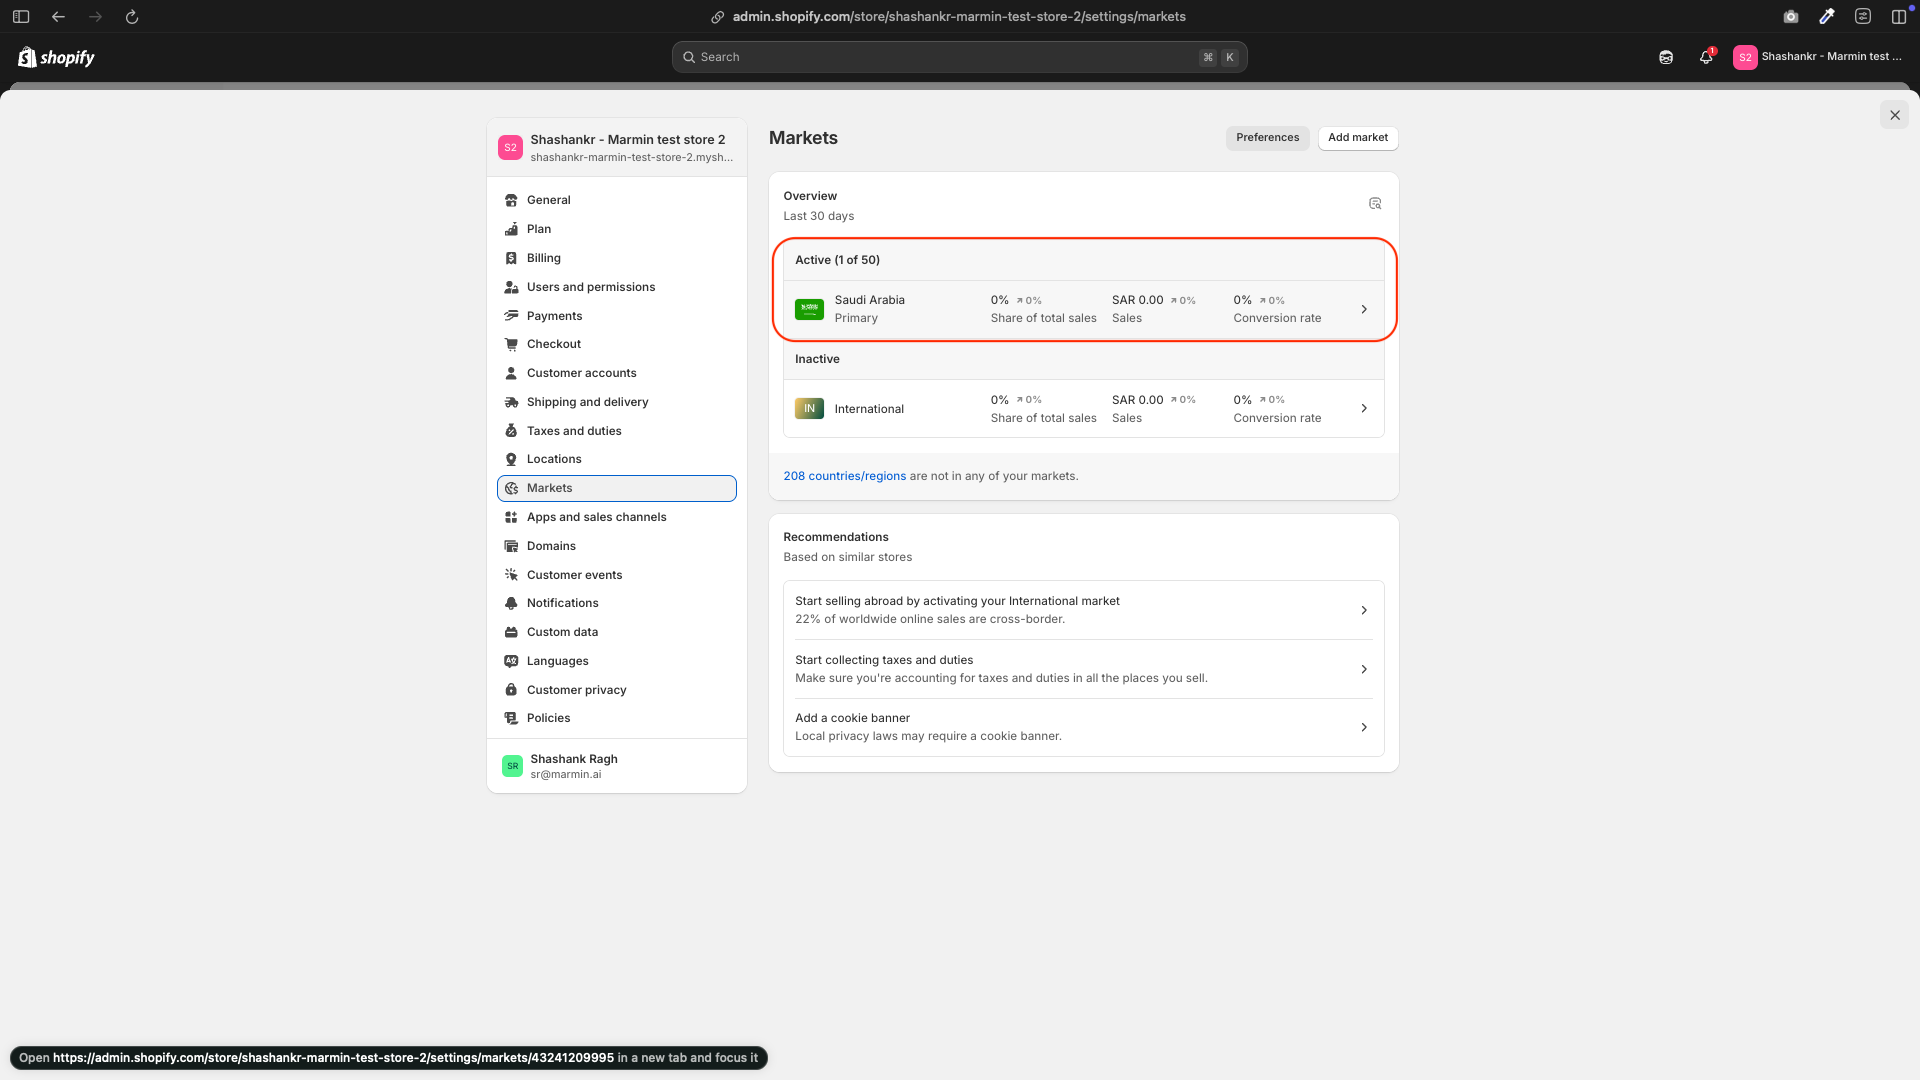
- Go to Settings → Markets.
- Click Add market.
- Select Saudi Arabia from the list of countries.
¶ 1.2 Activate the New Market
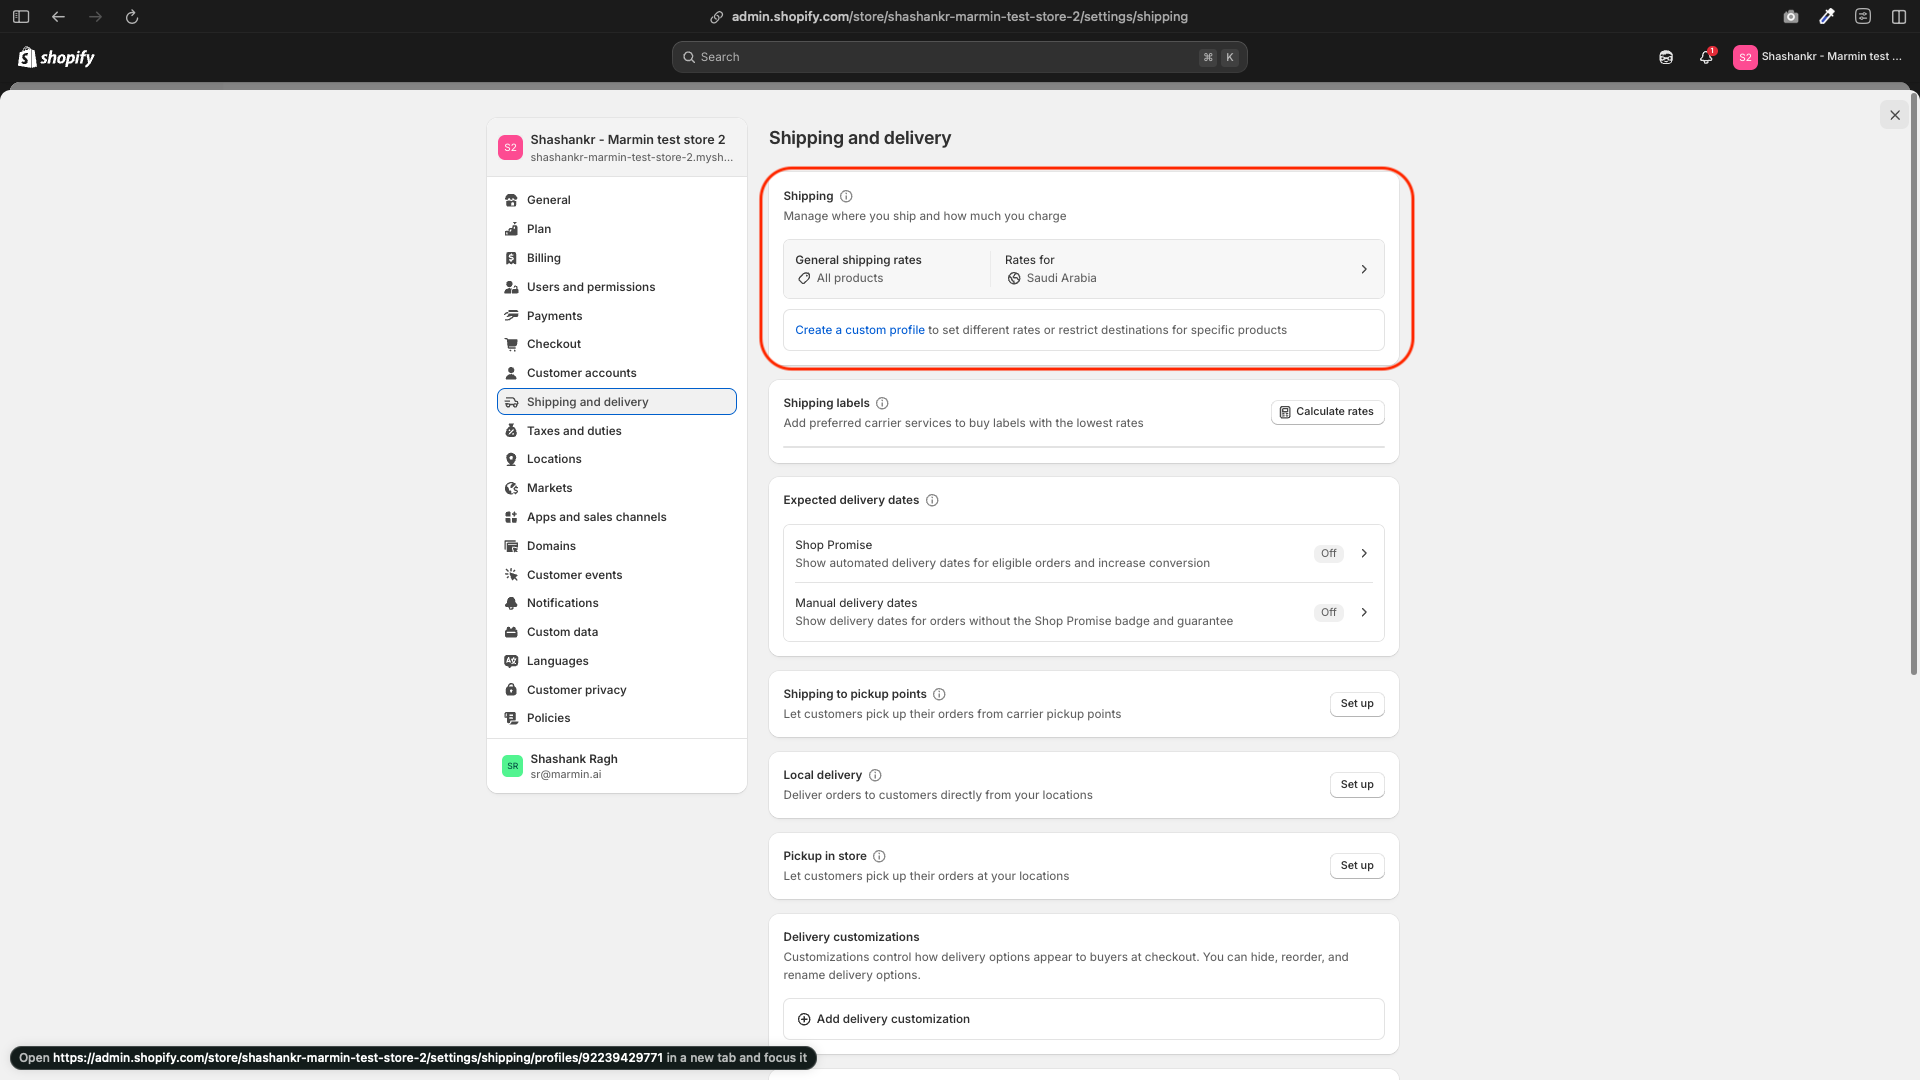
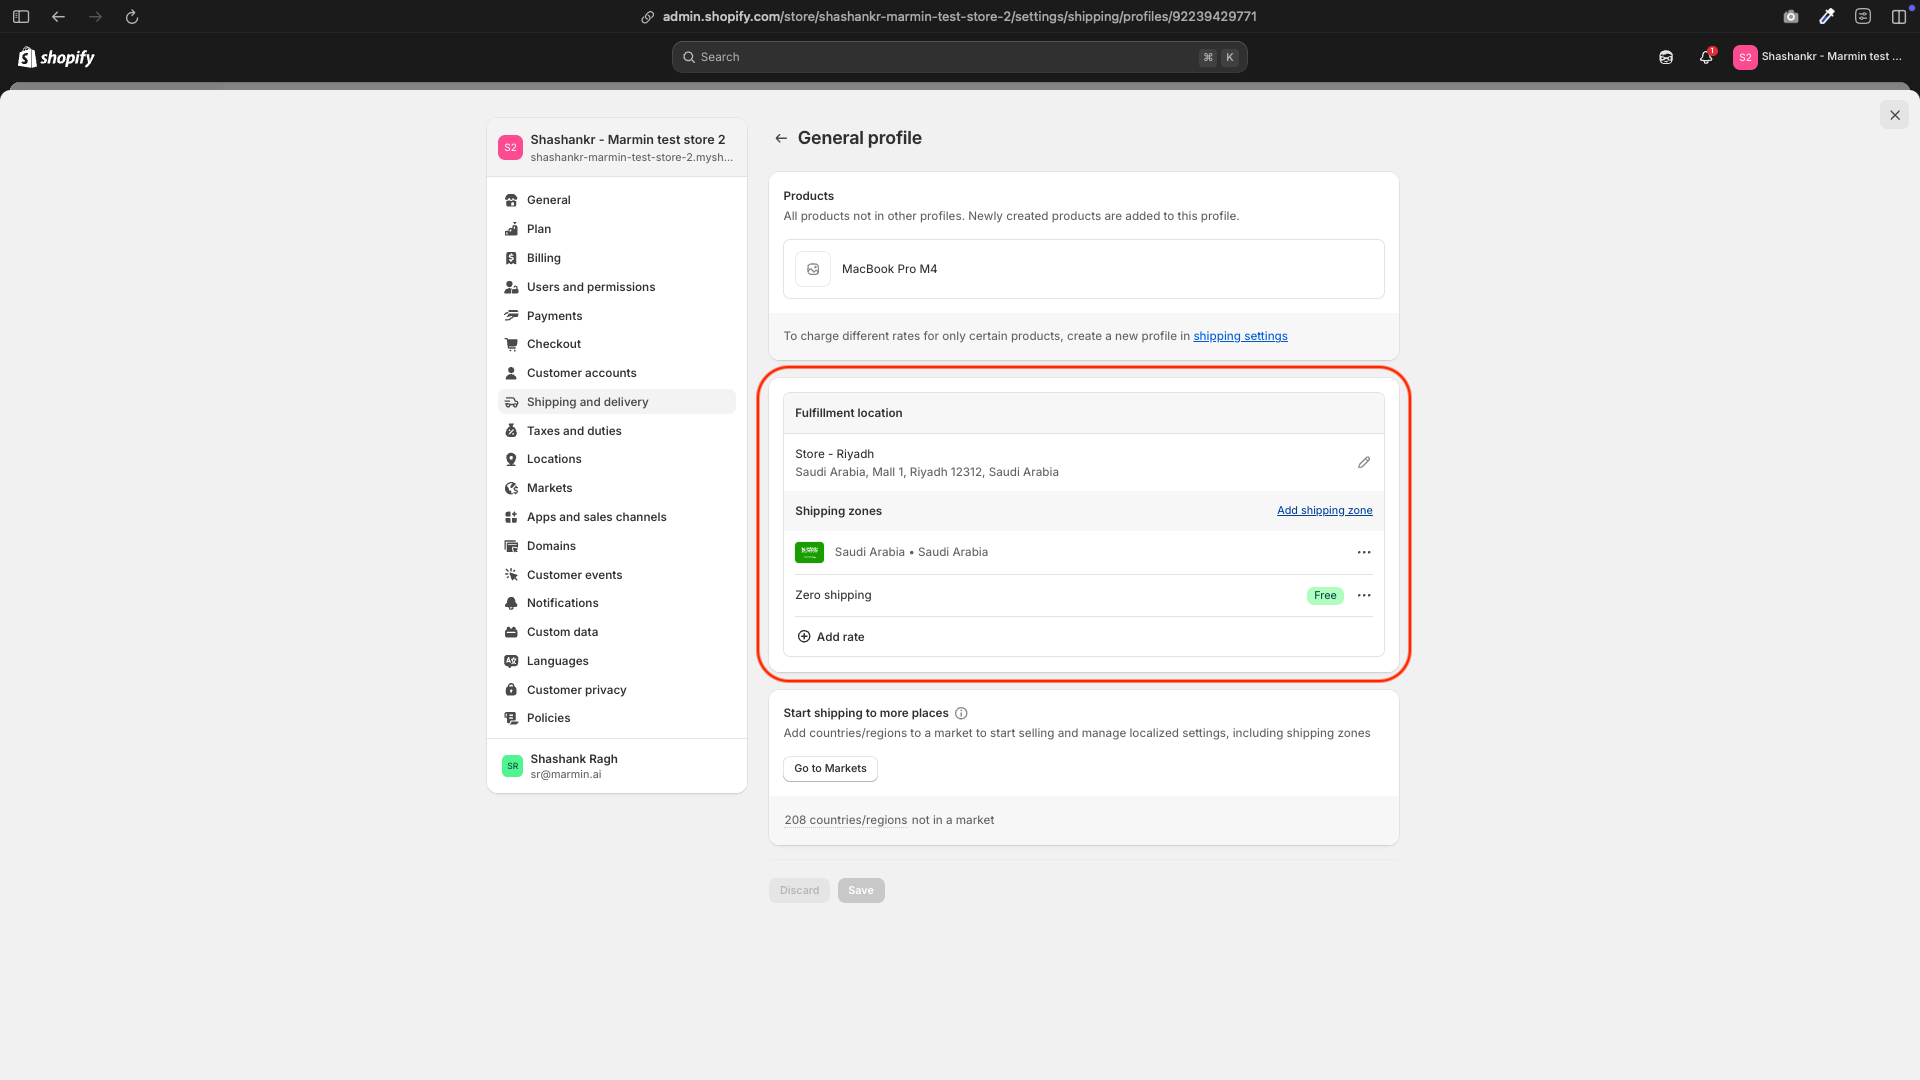
To activate the market, you need to set up shipping rates for Saudi Arabia:
- Go to Settings → Shipping and delivery.
- Under the Shipping section, click Manage rates.
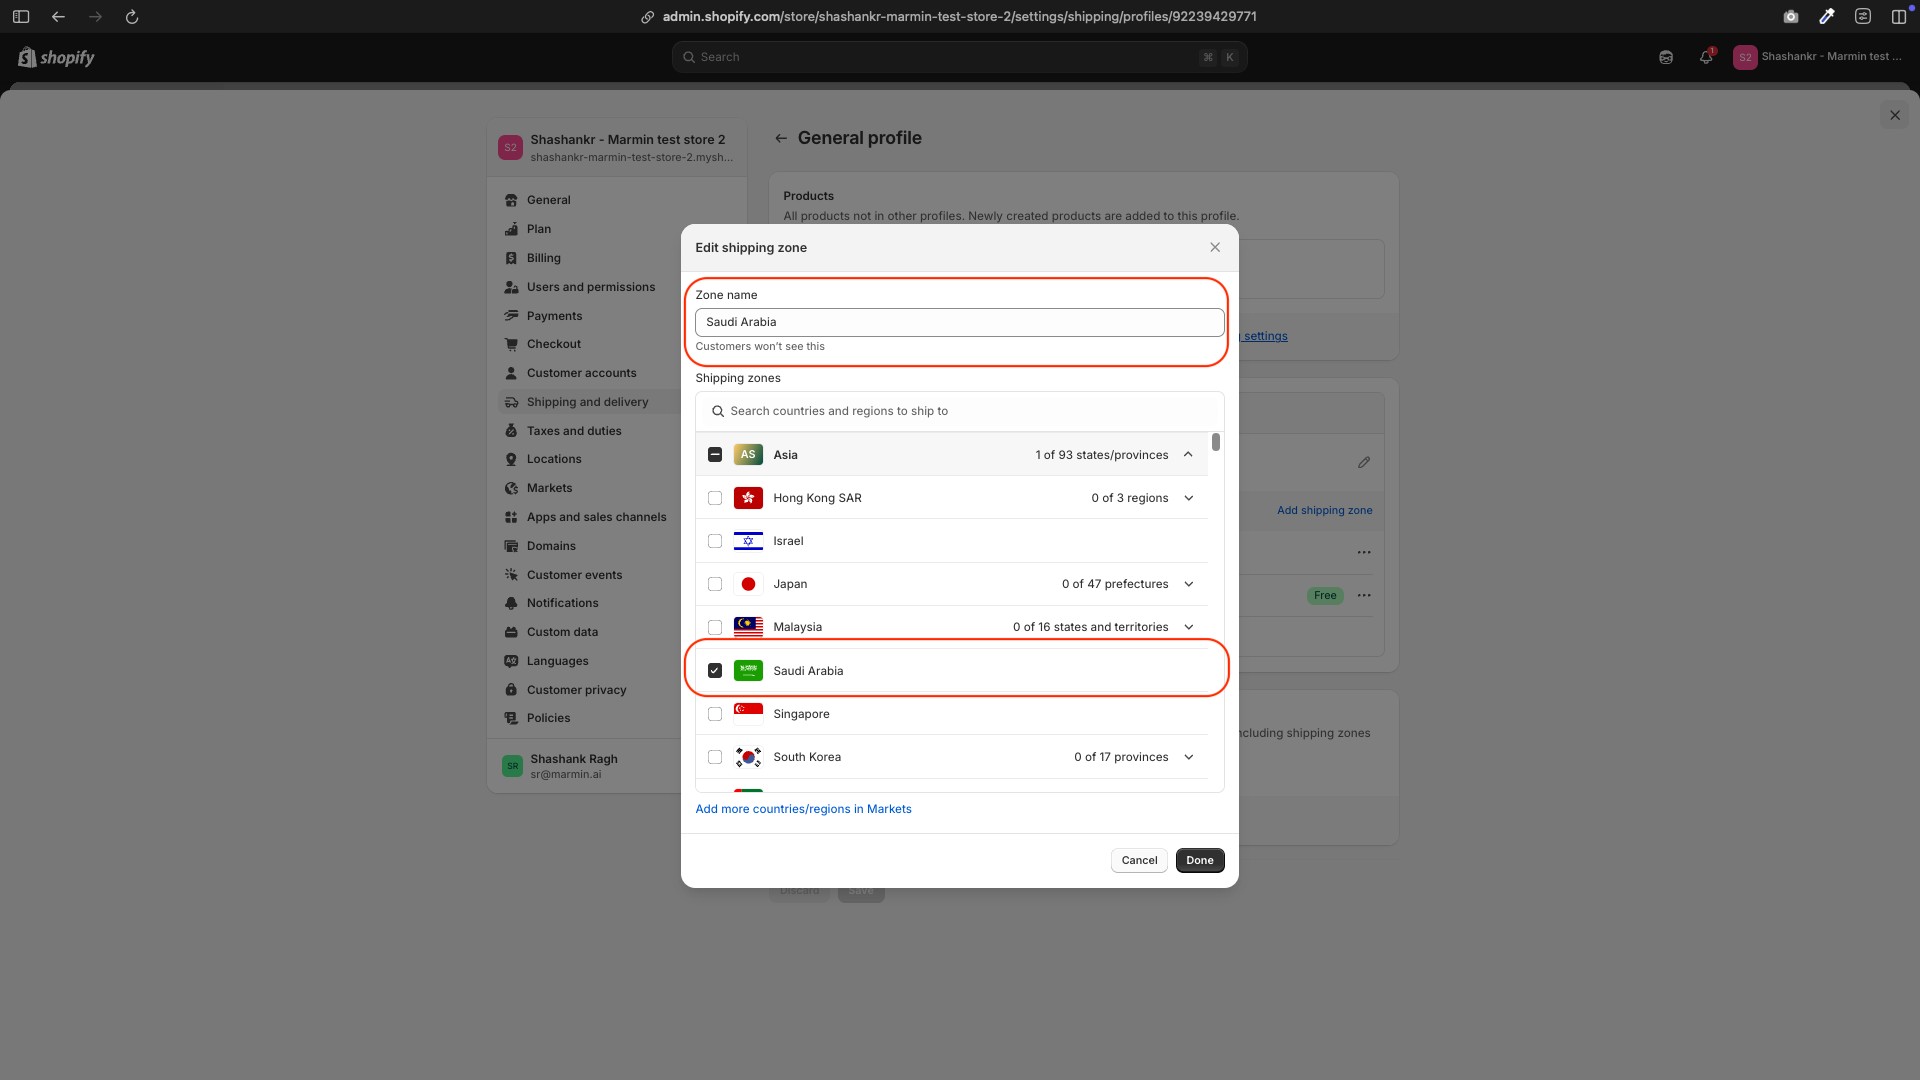
- Click Add shipping zone.
- Name the shipping zone (e.g., “Saudi Arabia”) and select Saudi Arabia as the shipping zone.
- Add the appropriate shipping rates for KSA (e.g., flat rate, free shipping, etc.).
If a shipping zone for Saudi Arabia already exists, edit it to ensure it’s correctly configured.
¶ 1.3 Set Saudi Arabia as the Primary Market
- Go back to Settings → Markets.
- Click on the newly added Saudi Arabia market.
- Activate the market by ensuring all required settings (e.g., shipping) are complete.
- Set Saudi Arabia as the primary market.
- Remove any other markets that are not needed.
¶ 2. Setting Up Tax Rates for Saudi Arabia
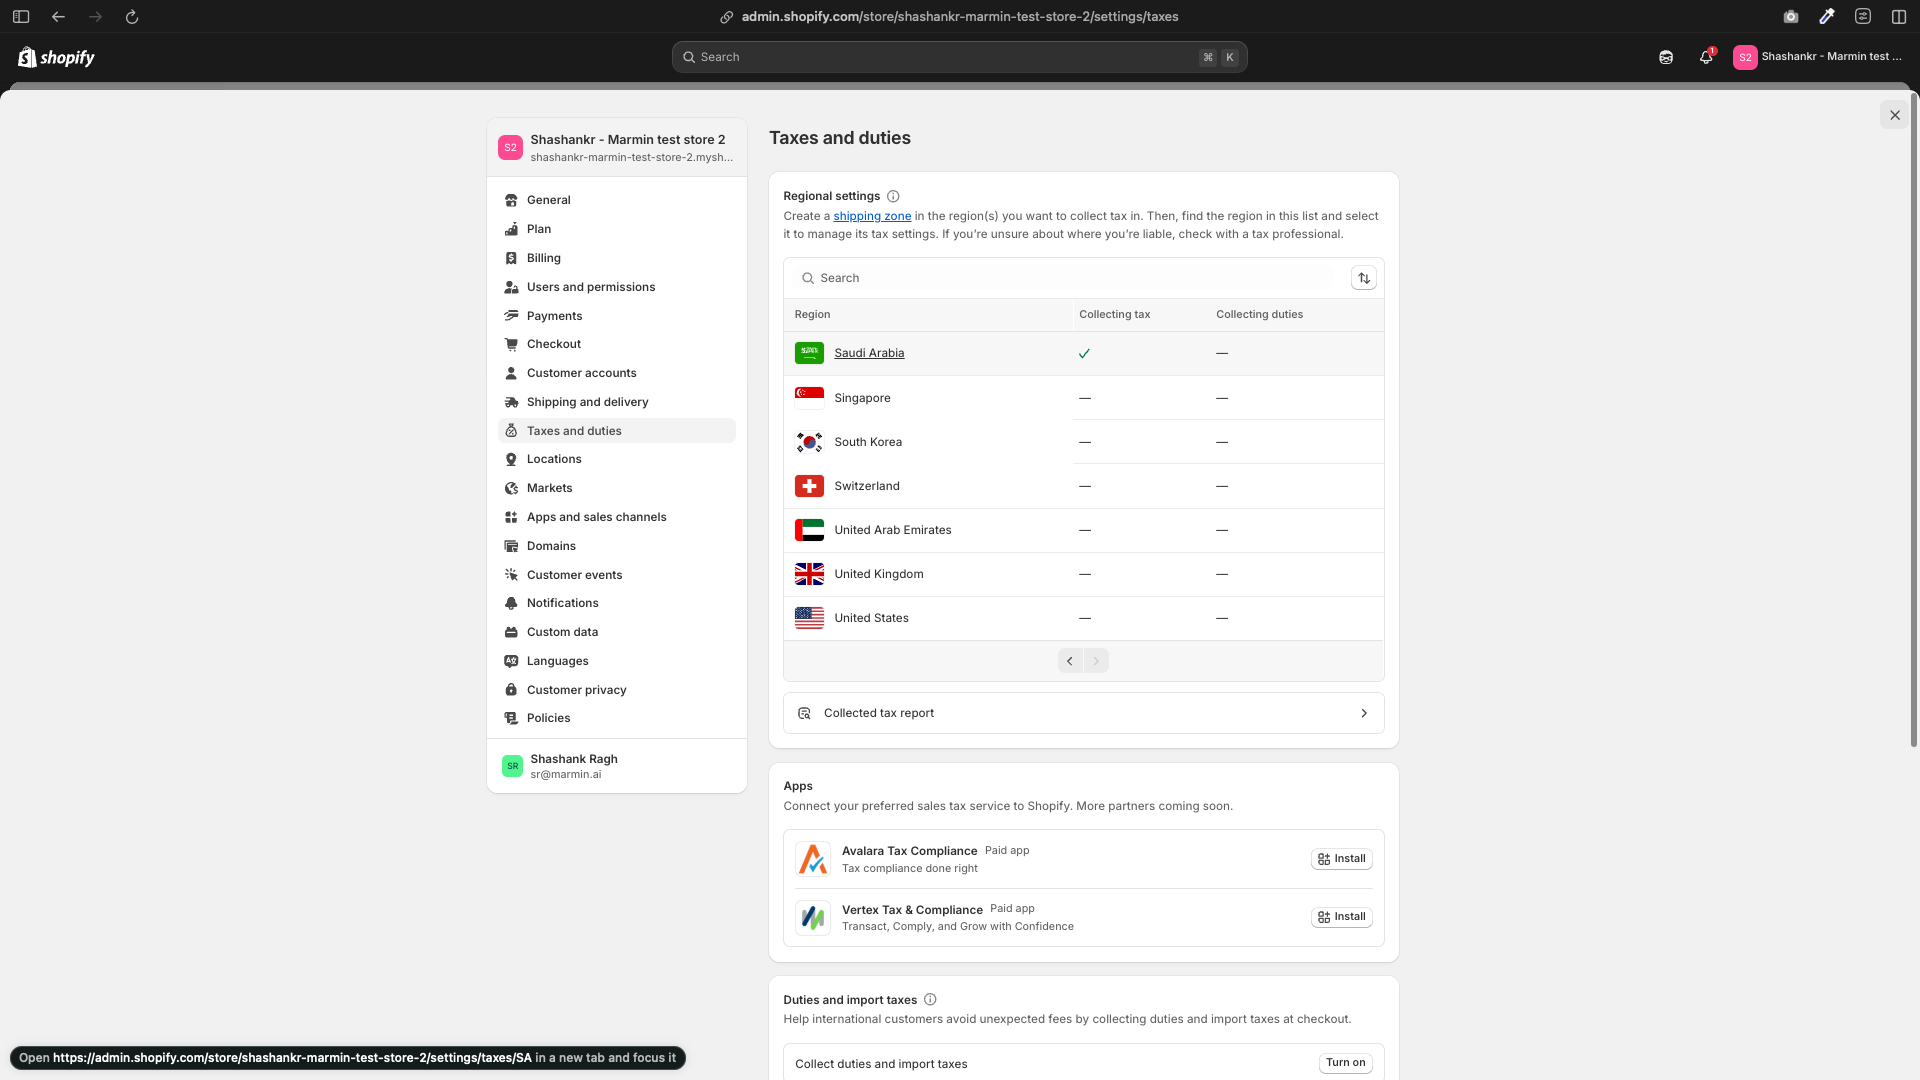
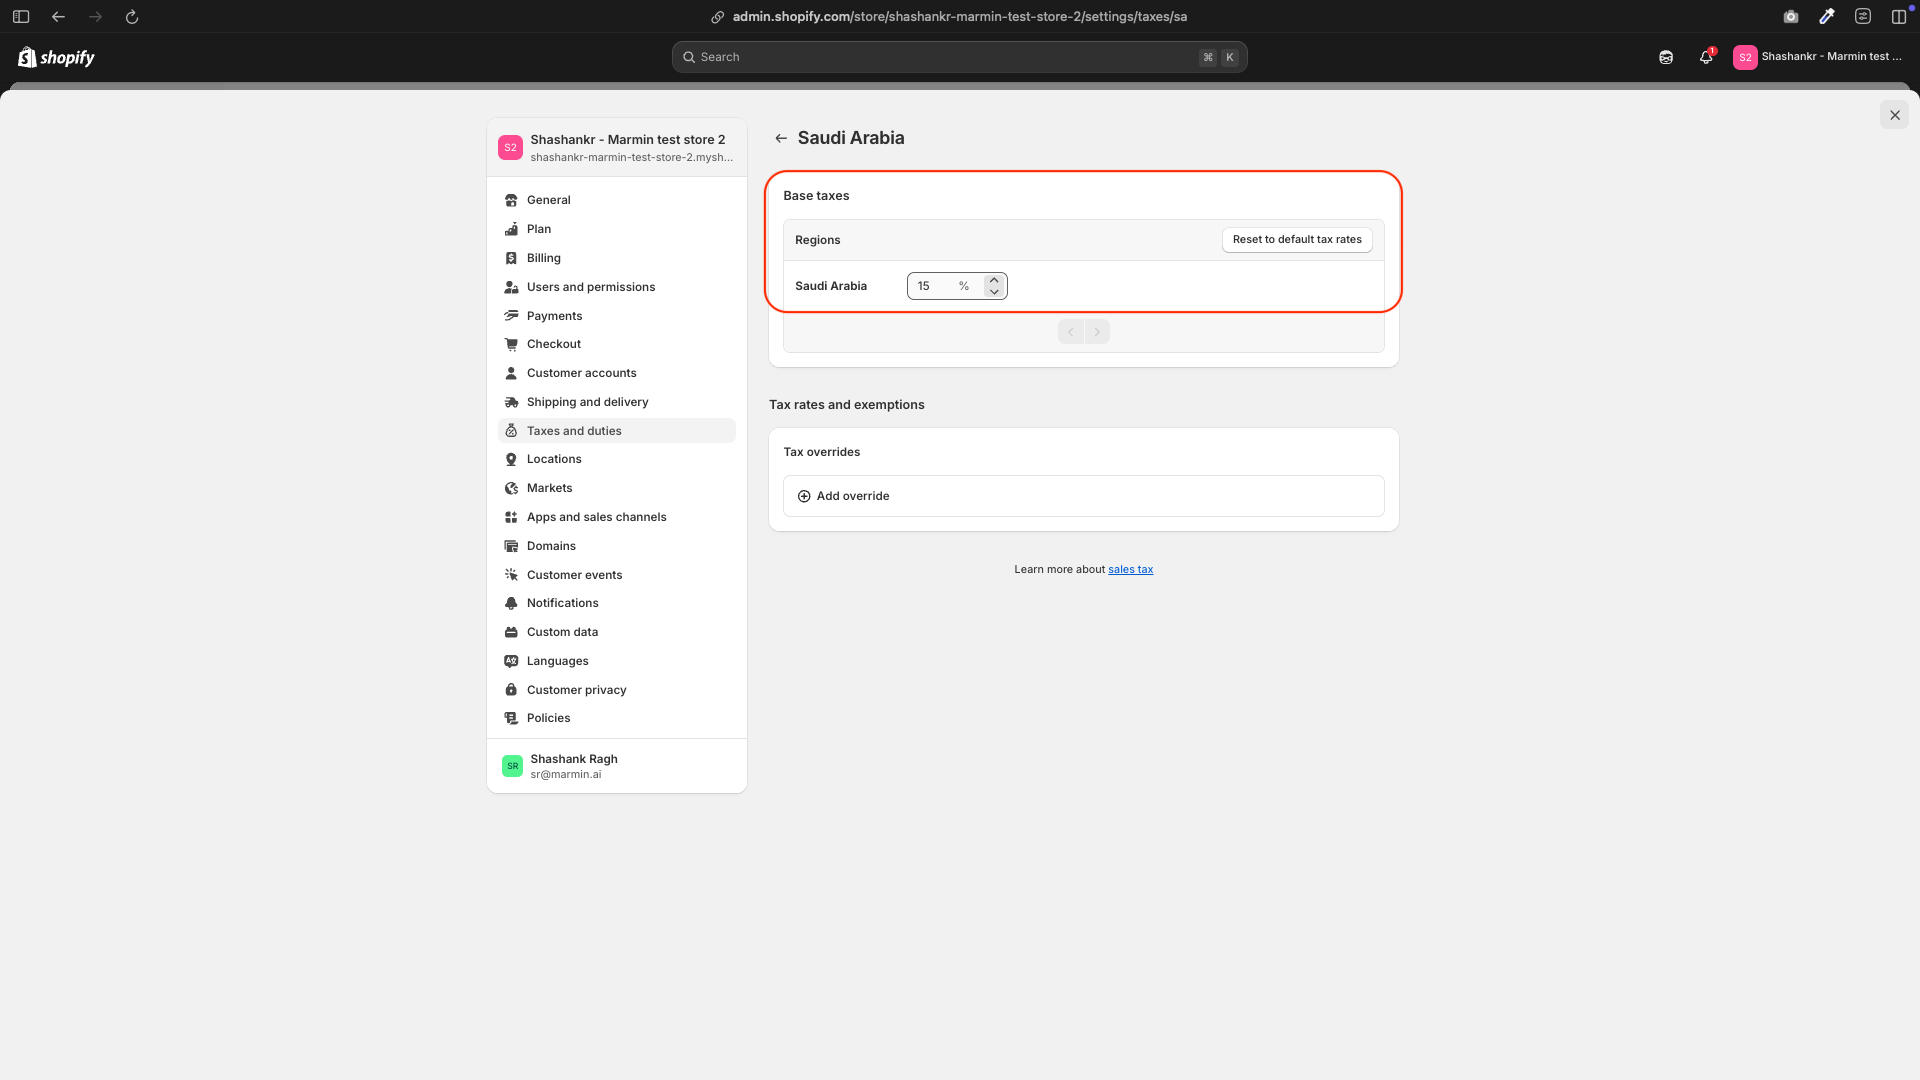
- Go to Settings → Taxes and duties.
- Under Tax regions, click on Saudi Arabia.
- Set the VAT rate to 15% (the standard VAT rate in KSA).
- Ensure the tax settings align with your pricing strategy (tax-inclusive or tax-exclusive).
¶ 3. Setting Tax-Inclusive or Tax-Exclusive Pricing
¶ 3.1 For Tax-Inclusive Pricing
- Go to Settings → Taxes and duties.
- Under Global settings, enable Include sales tax in product price and shipping rate.
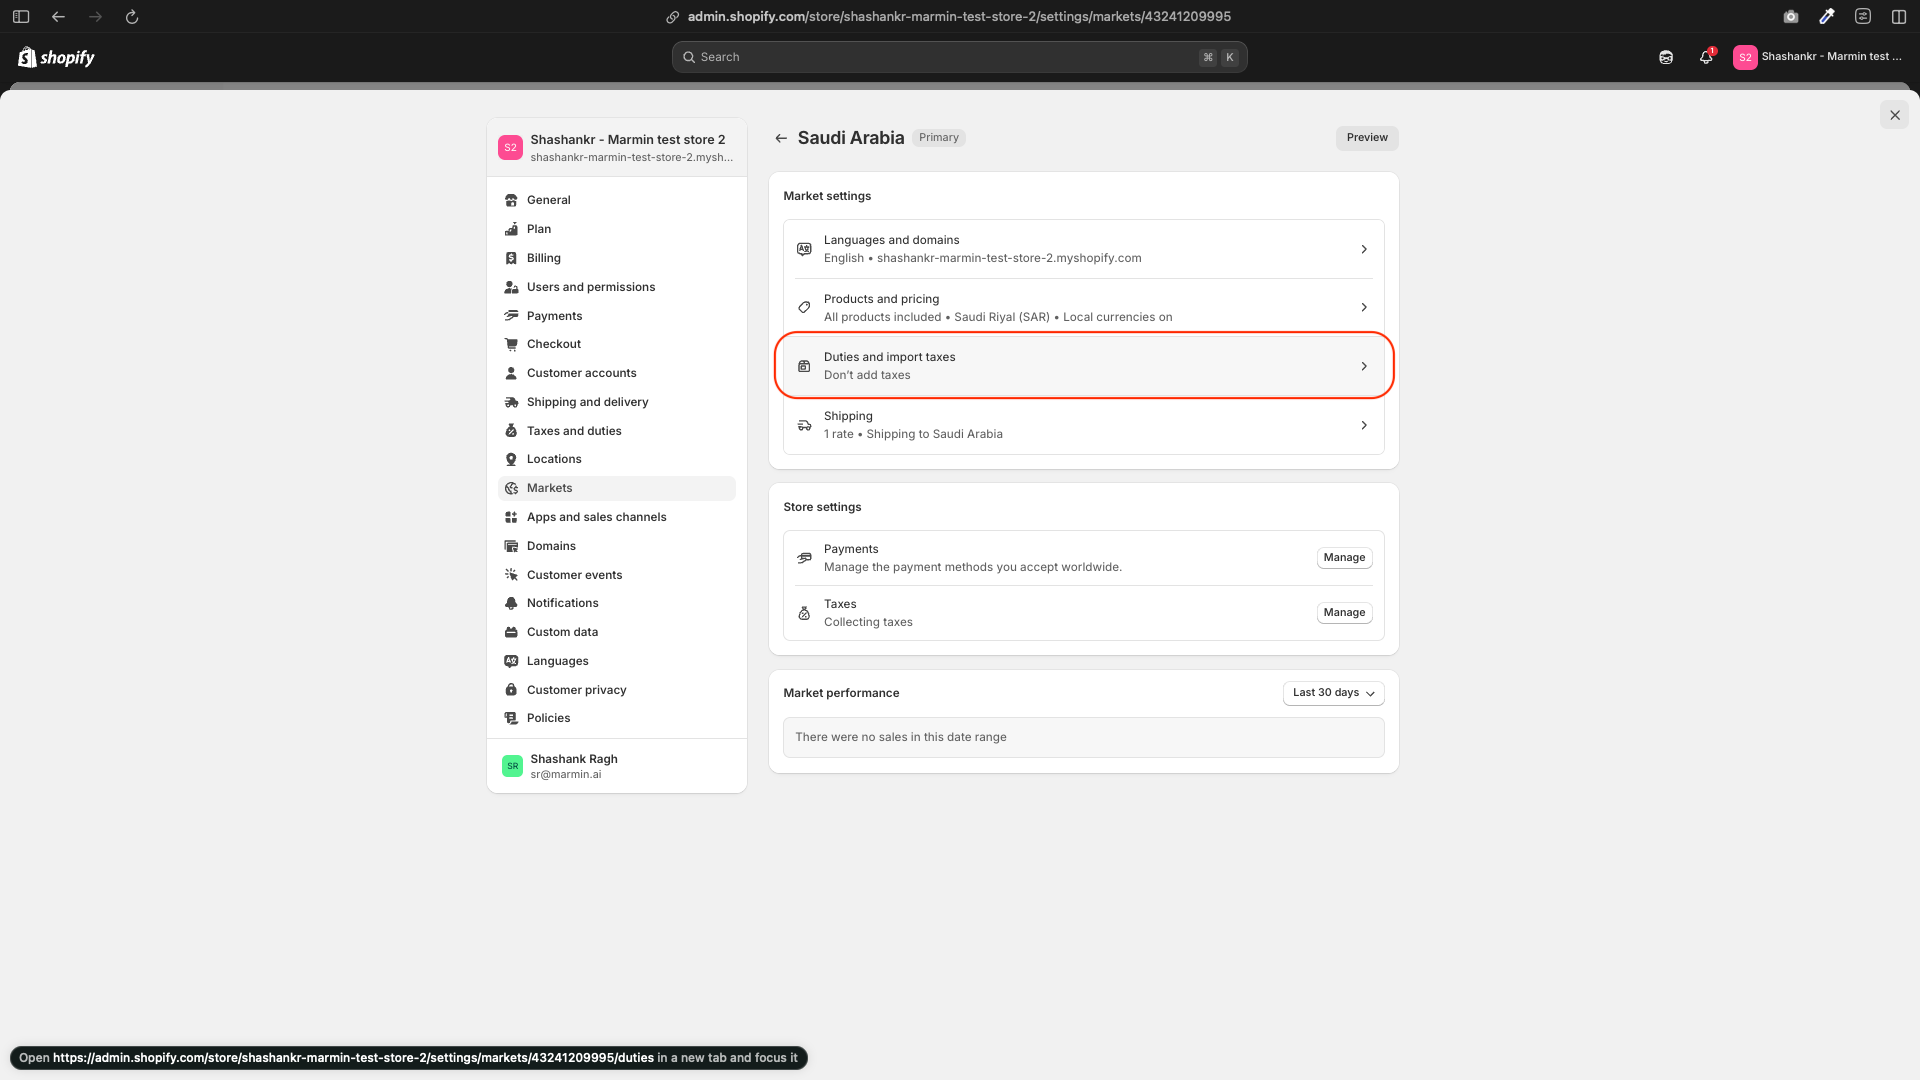
- Go to Settings → Markets → Saudi Arabia.
- Under Duties and taxes, ensure Storefront and checkout pricing is set to “Don’t add taxes”.
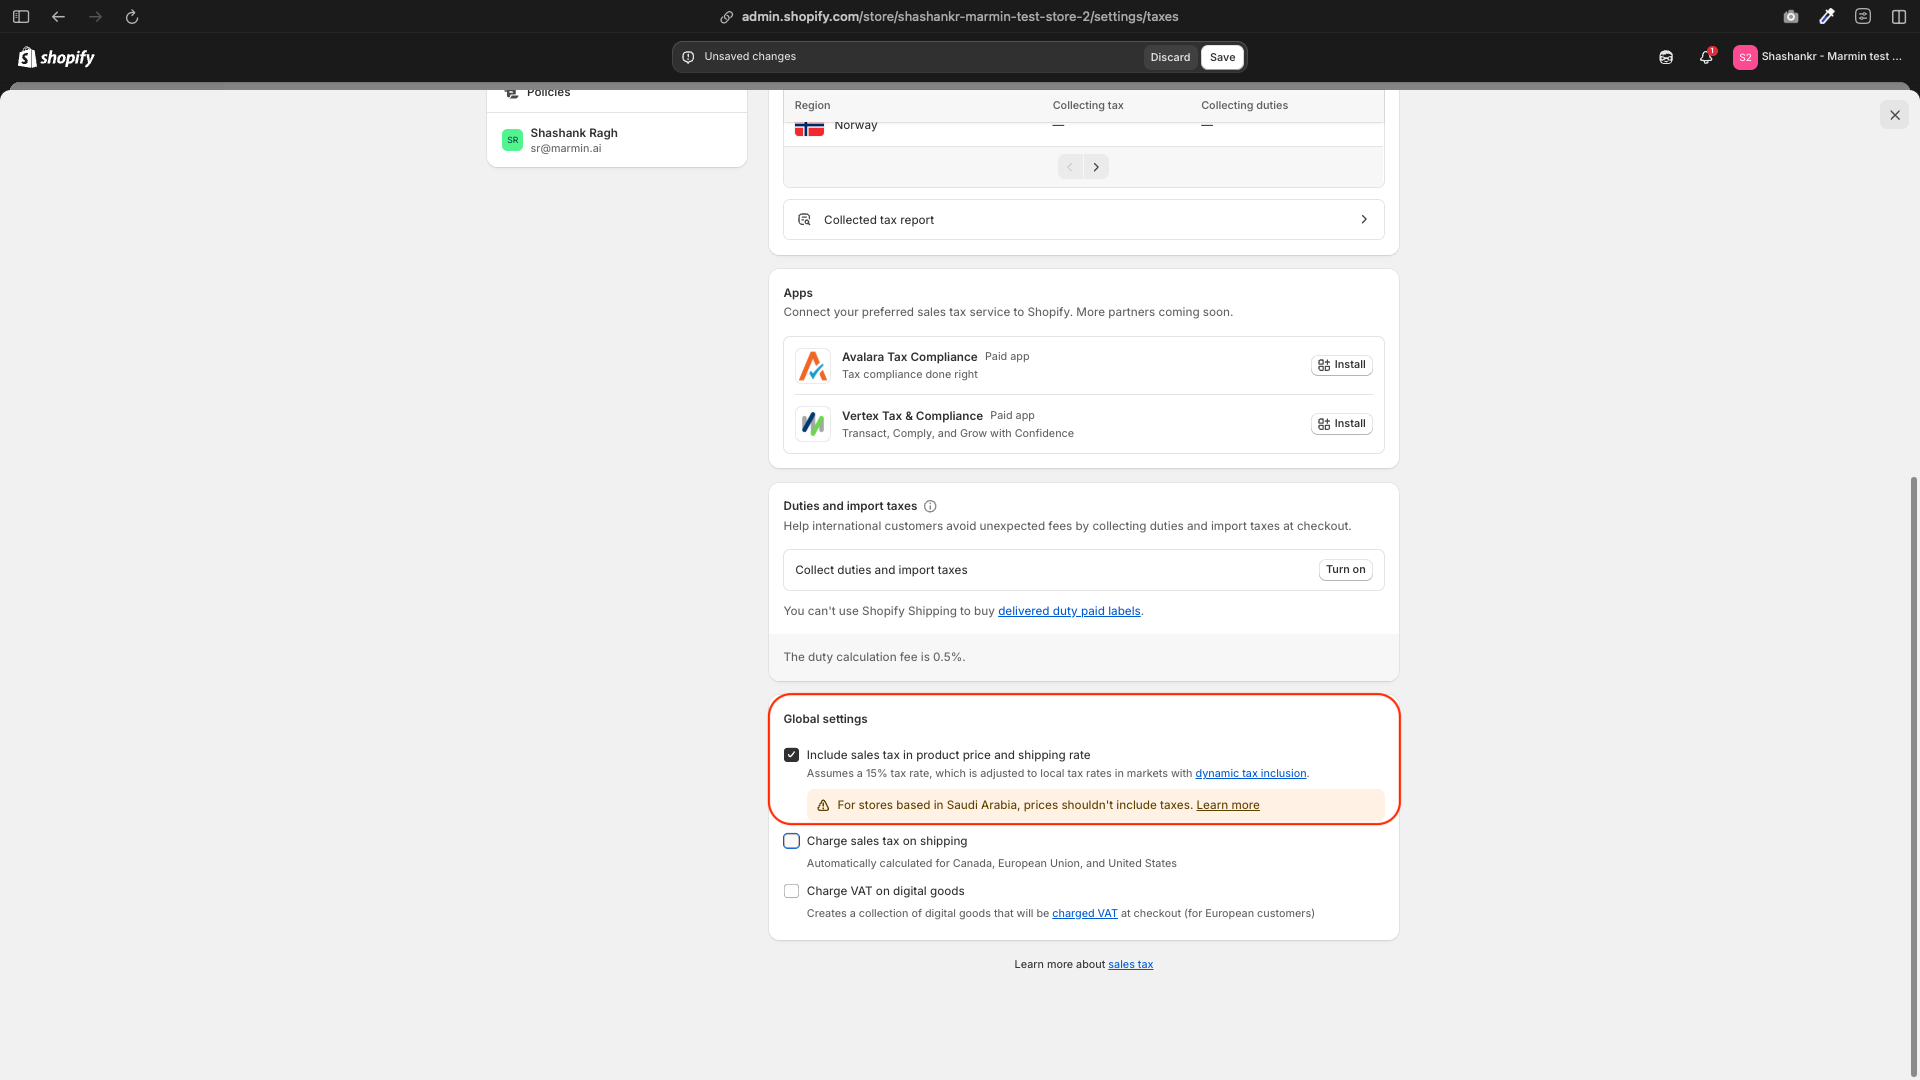
¶ 3.2 For Tax-Exclusive Pricing
- Go to Settings → Taxes and duties.
- Under Global settings, disable Include sales tax in product price and shipping rate.
- Under Duties and taxes, ensure Storefront and checkout pricing is set to “Add taxes at checkout”.
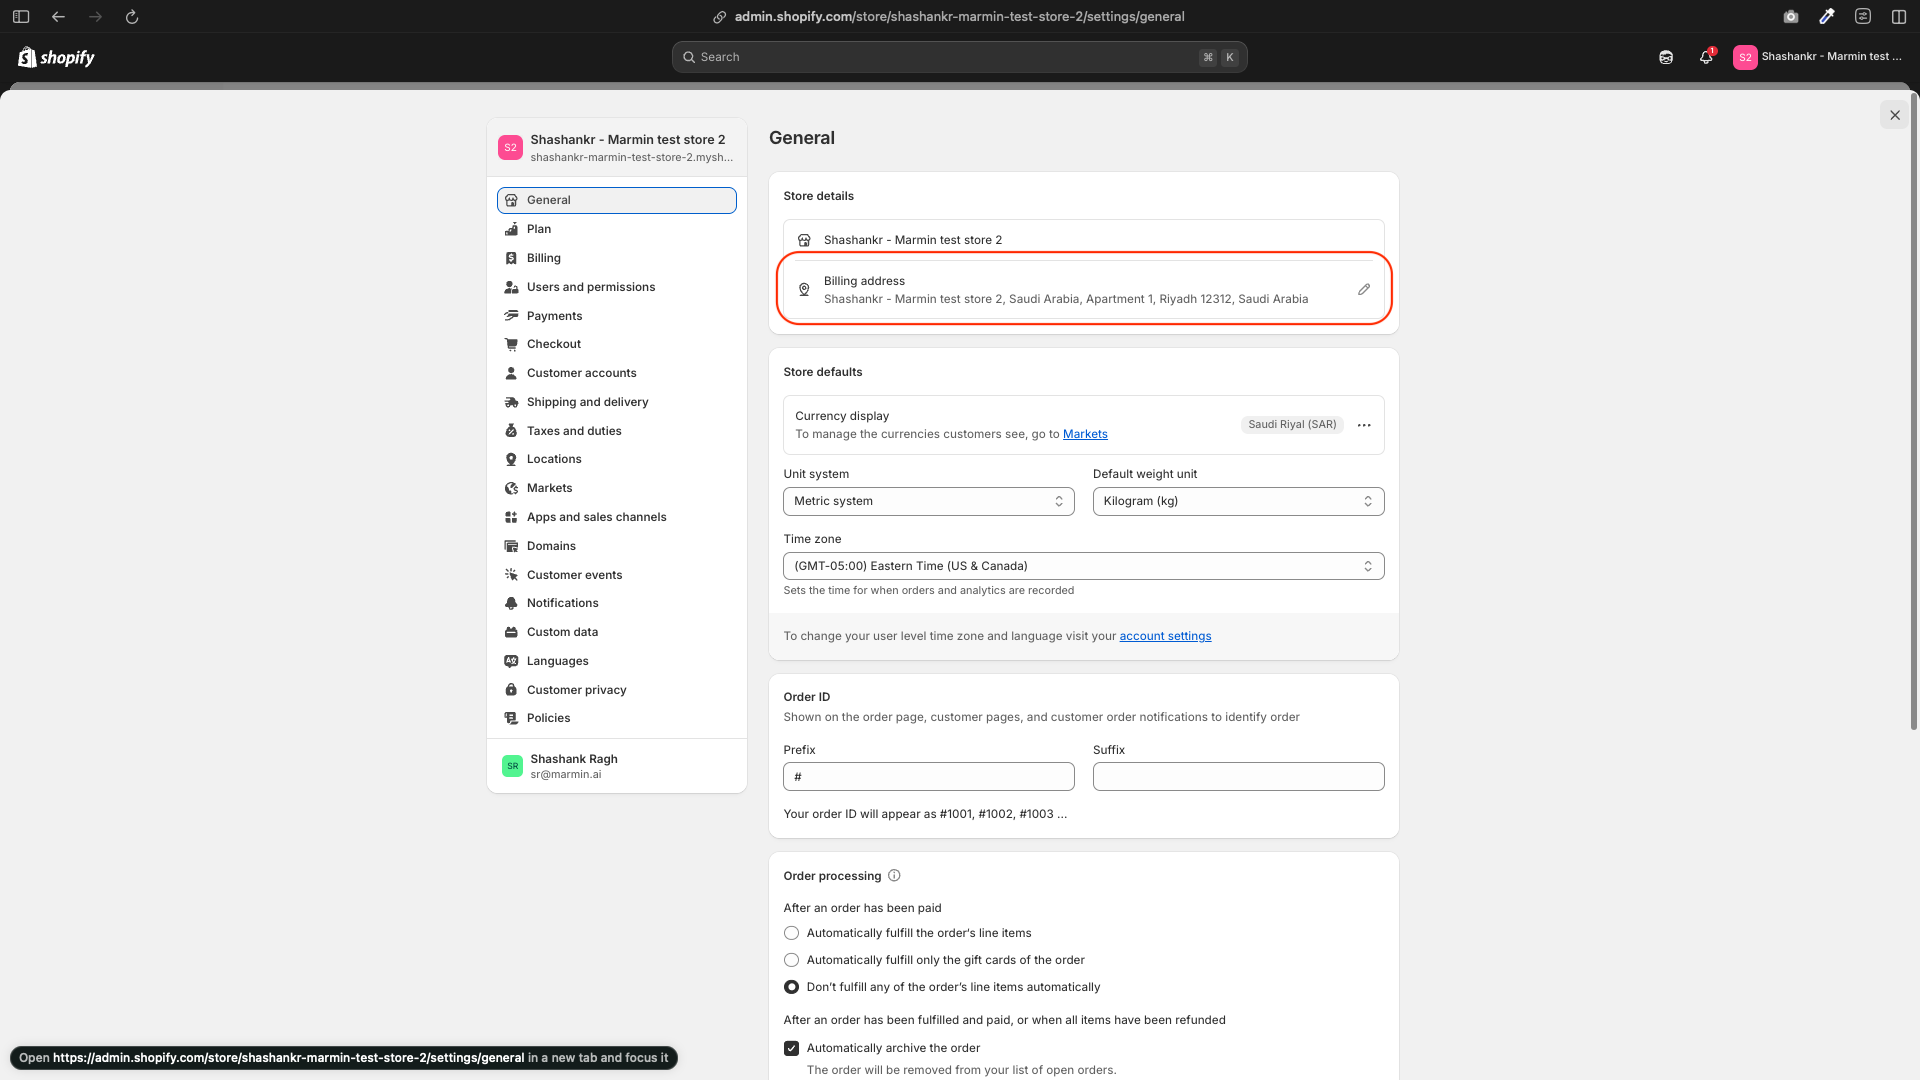
- Store Address: Ensure your store address is set to Saudi Arabia in Settings → Store details. This is important for tax calculations and market settings.
Note: Your store’s address in the Shopify admin determines the home tax rate. If you change your store’s address to another country, the tax rate will adjust accordingly.
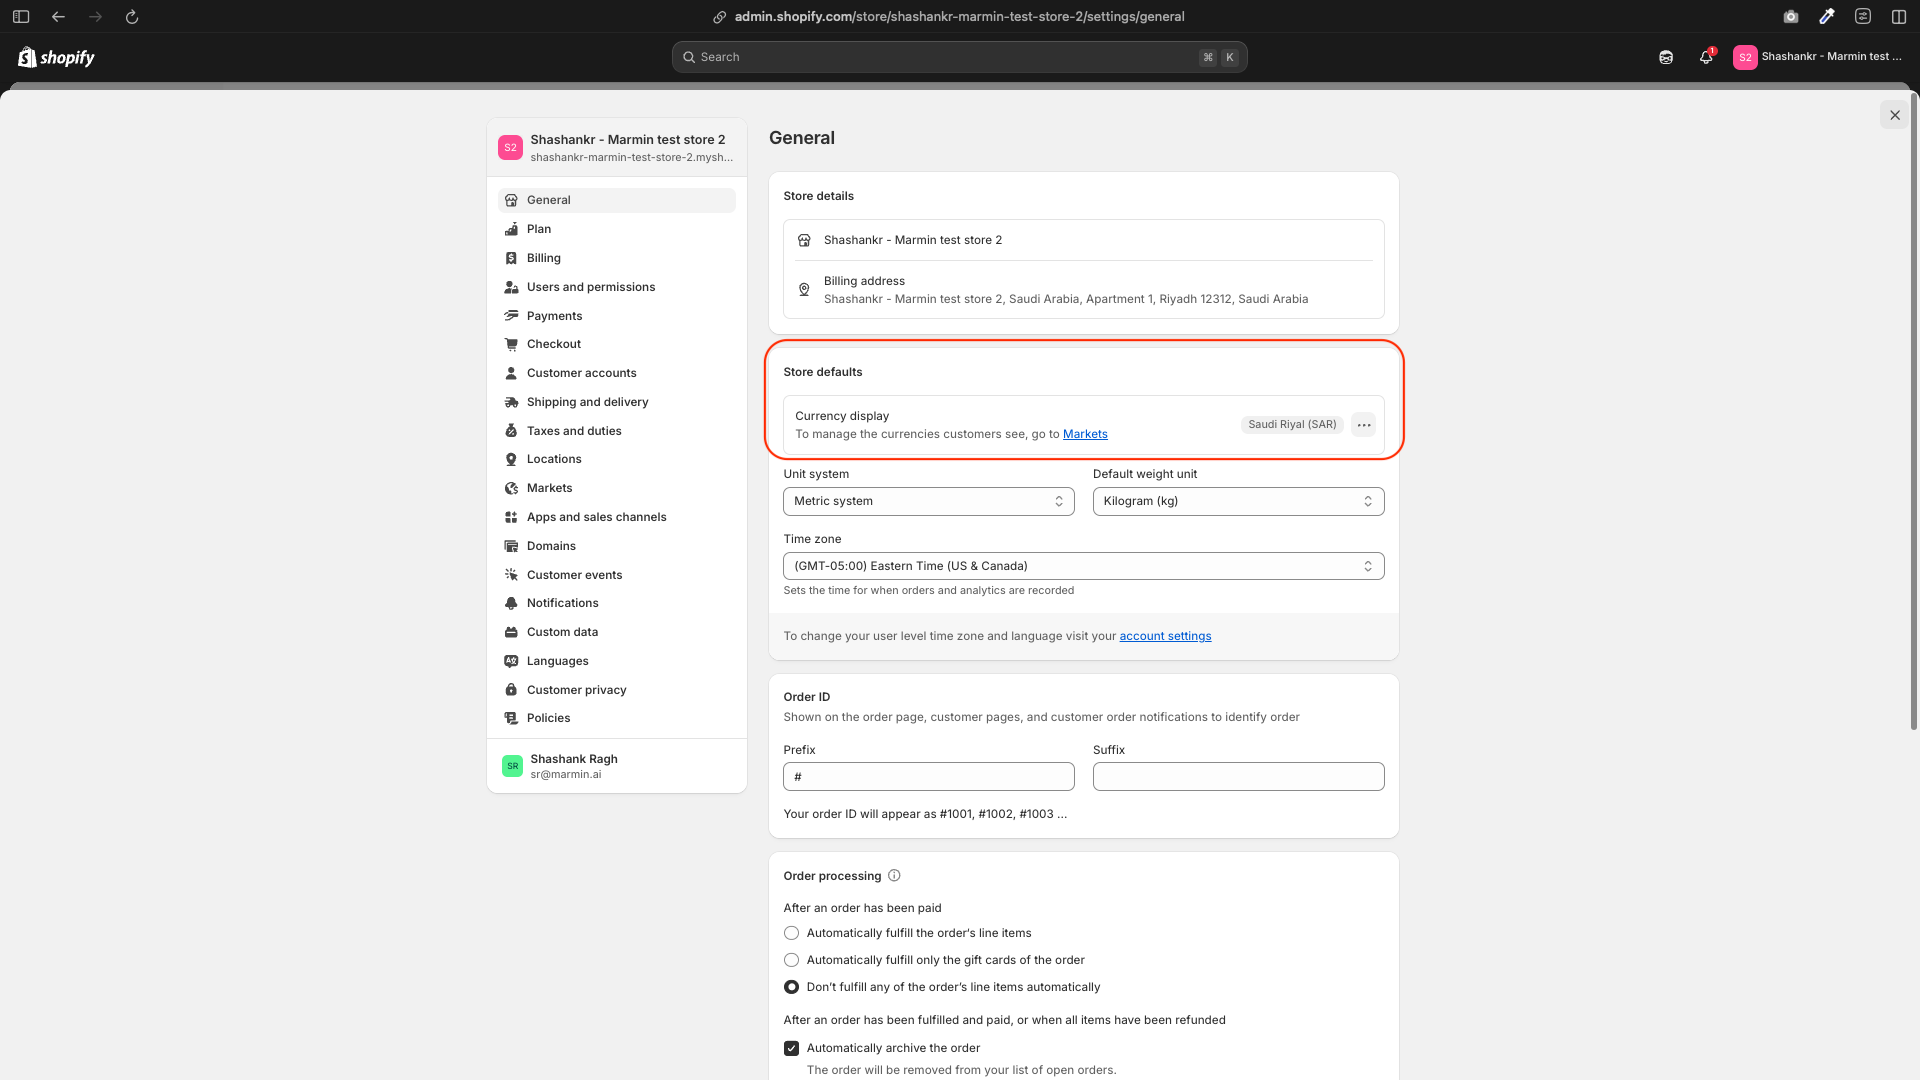
¶ 4. Setting the Store Currency
- Go to Settings → Store details.
- Under Store currency, select Saudi Riyal (SAR).

¶ Summary of Steps
- Add and activate Saudi Arabia as a market.
- Set up shipping zones and rates for KSA.
- Configure the 15% VAT rate.
- Choose between tax-inclusive or tax-exclusive pricing.
- Set the store currency to SAR.
¶ Arabic Product Translation
For businesses operating in Saudi Arabia and using Shopify, a key requirement from ZATCA is that your e-invoices must include product names in Arabic. While Marmin automatically translates most standard invoice details to Arabic, your custom product names usually need a special setup.
This guide will show you how to add Arabic translations for your product names in Shopify, and how to link this to Marmin so your invoices are ZATCA compliant.
¶ Step 1: Add a New Metafield Definition in Shopify
First, we need to create a special place in Shopify where you can put the Arabic translation for each product.
- Log in to your Shopify admin dashboard.
- On the left side menu, click on "Settings" (the gear icon at the bottom left).
- In the Settings menu, click on "Metafields and metaobjects.".
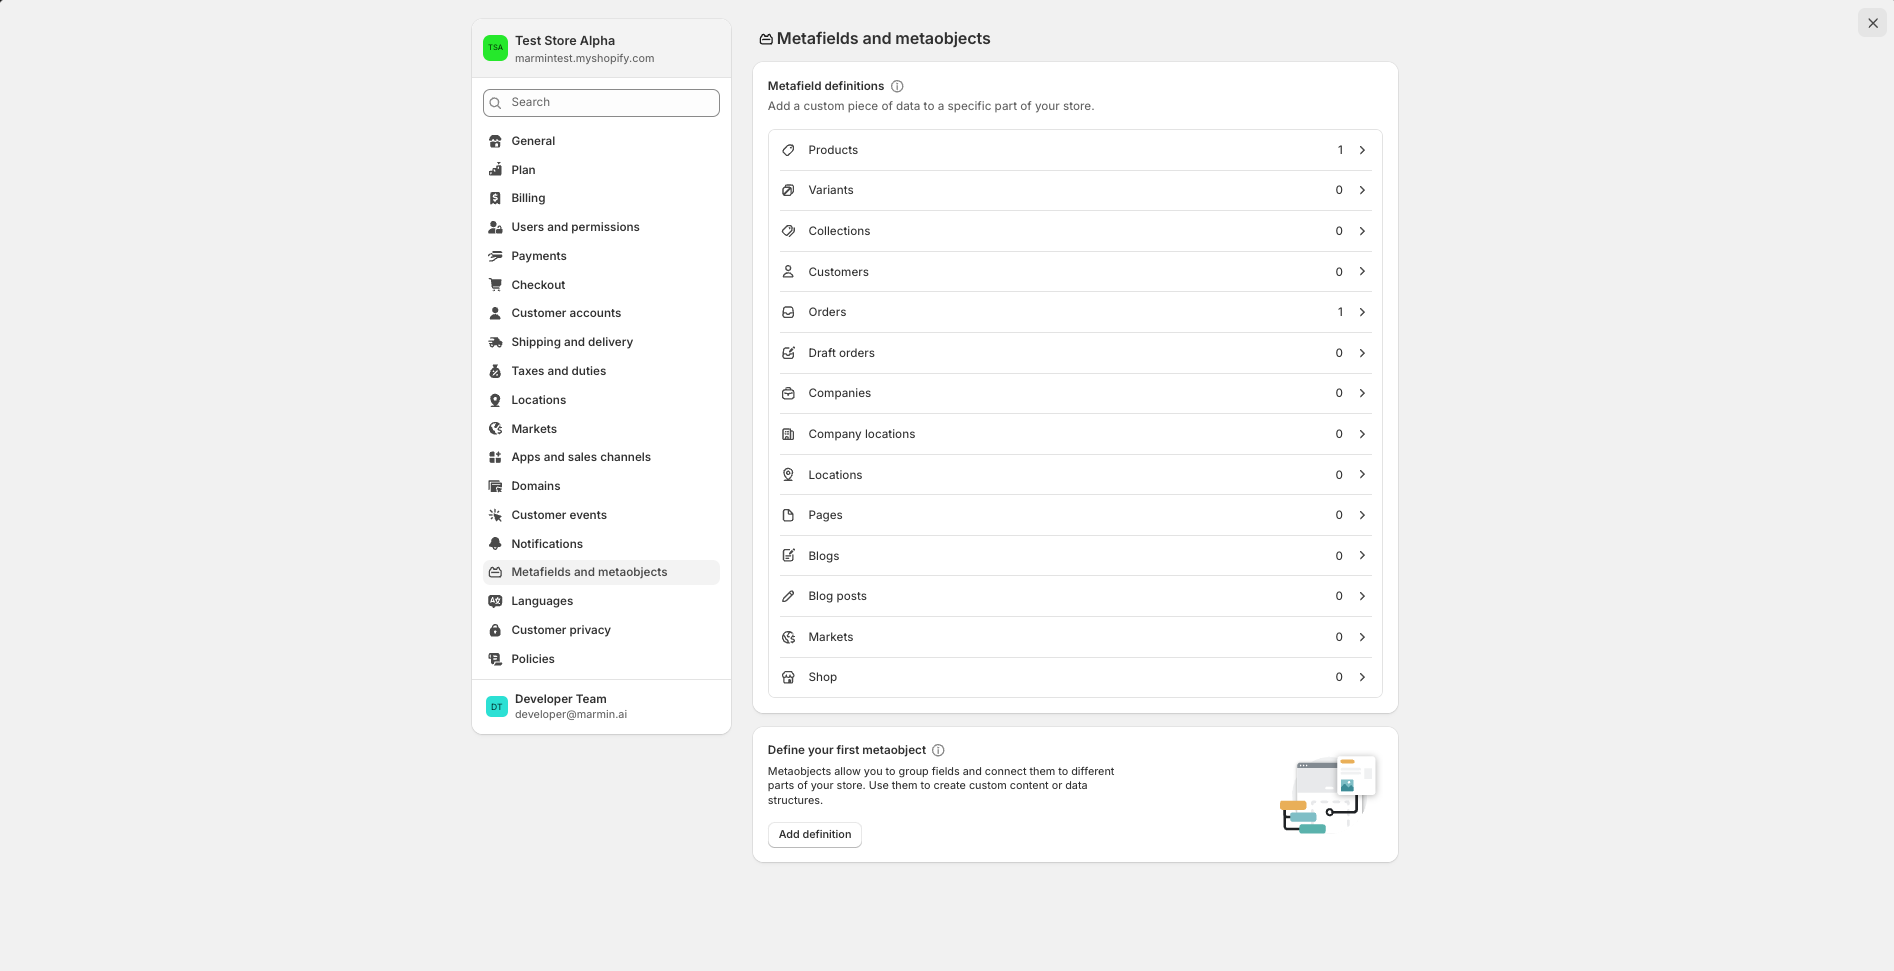
- On the "Product metafield definitions" page, click "Add definition" (or "+ Add definition" if it's your first one).
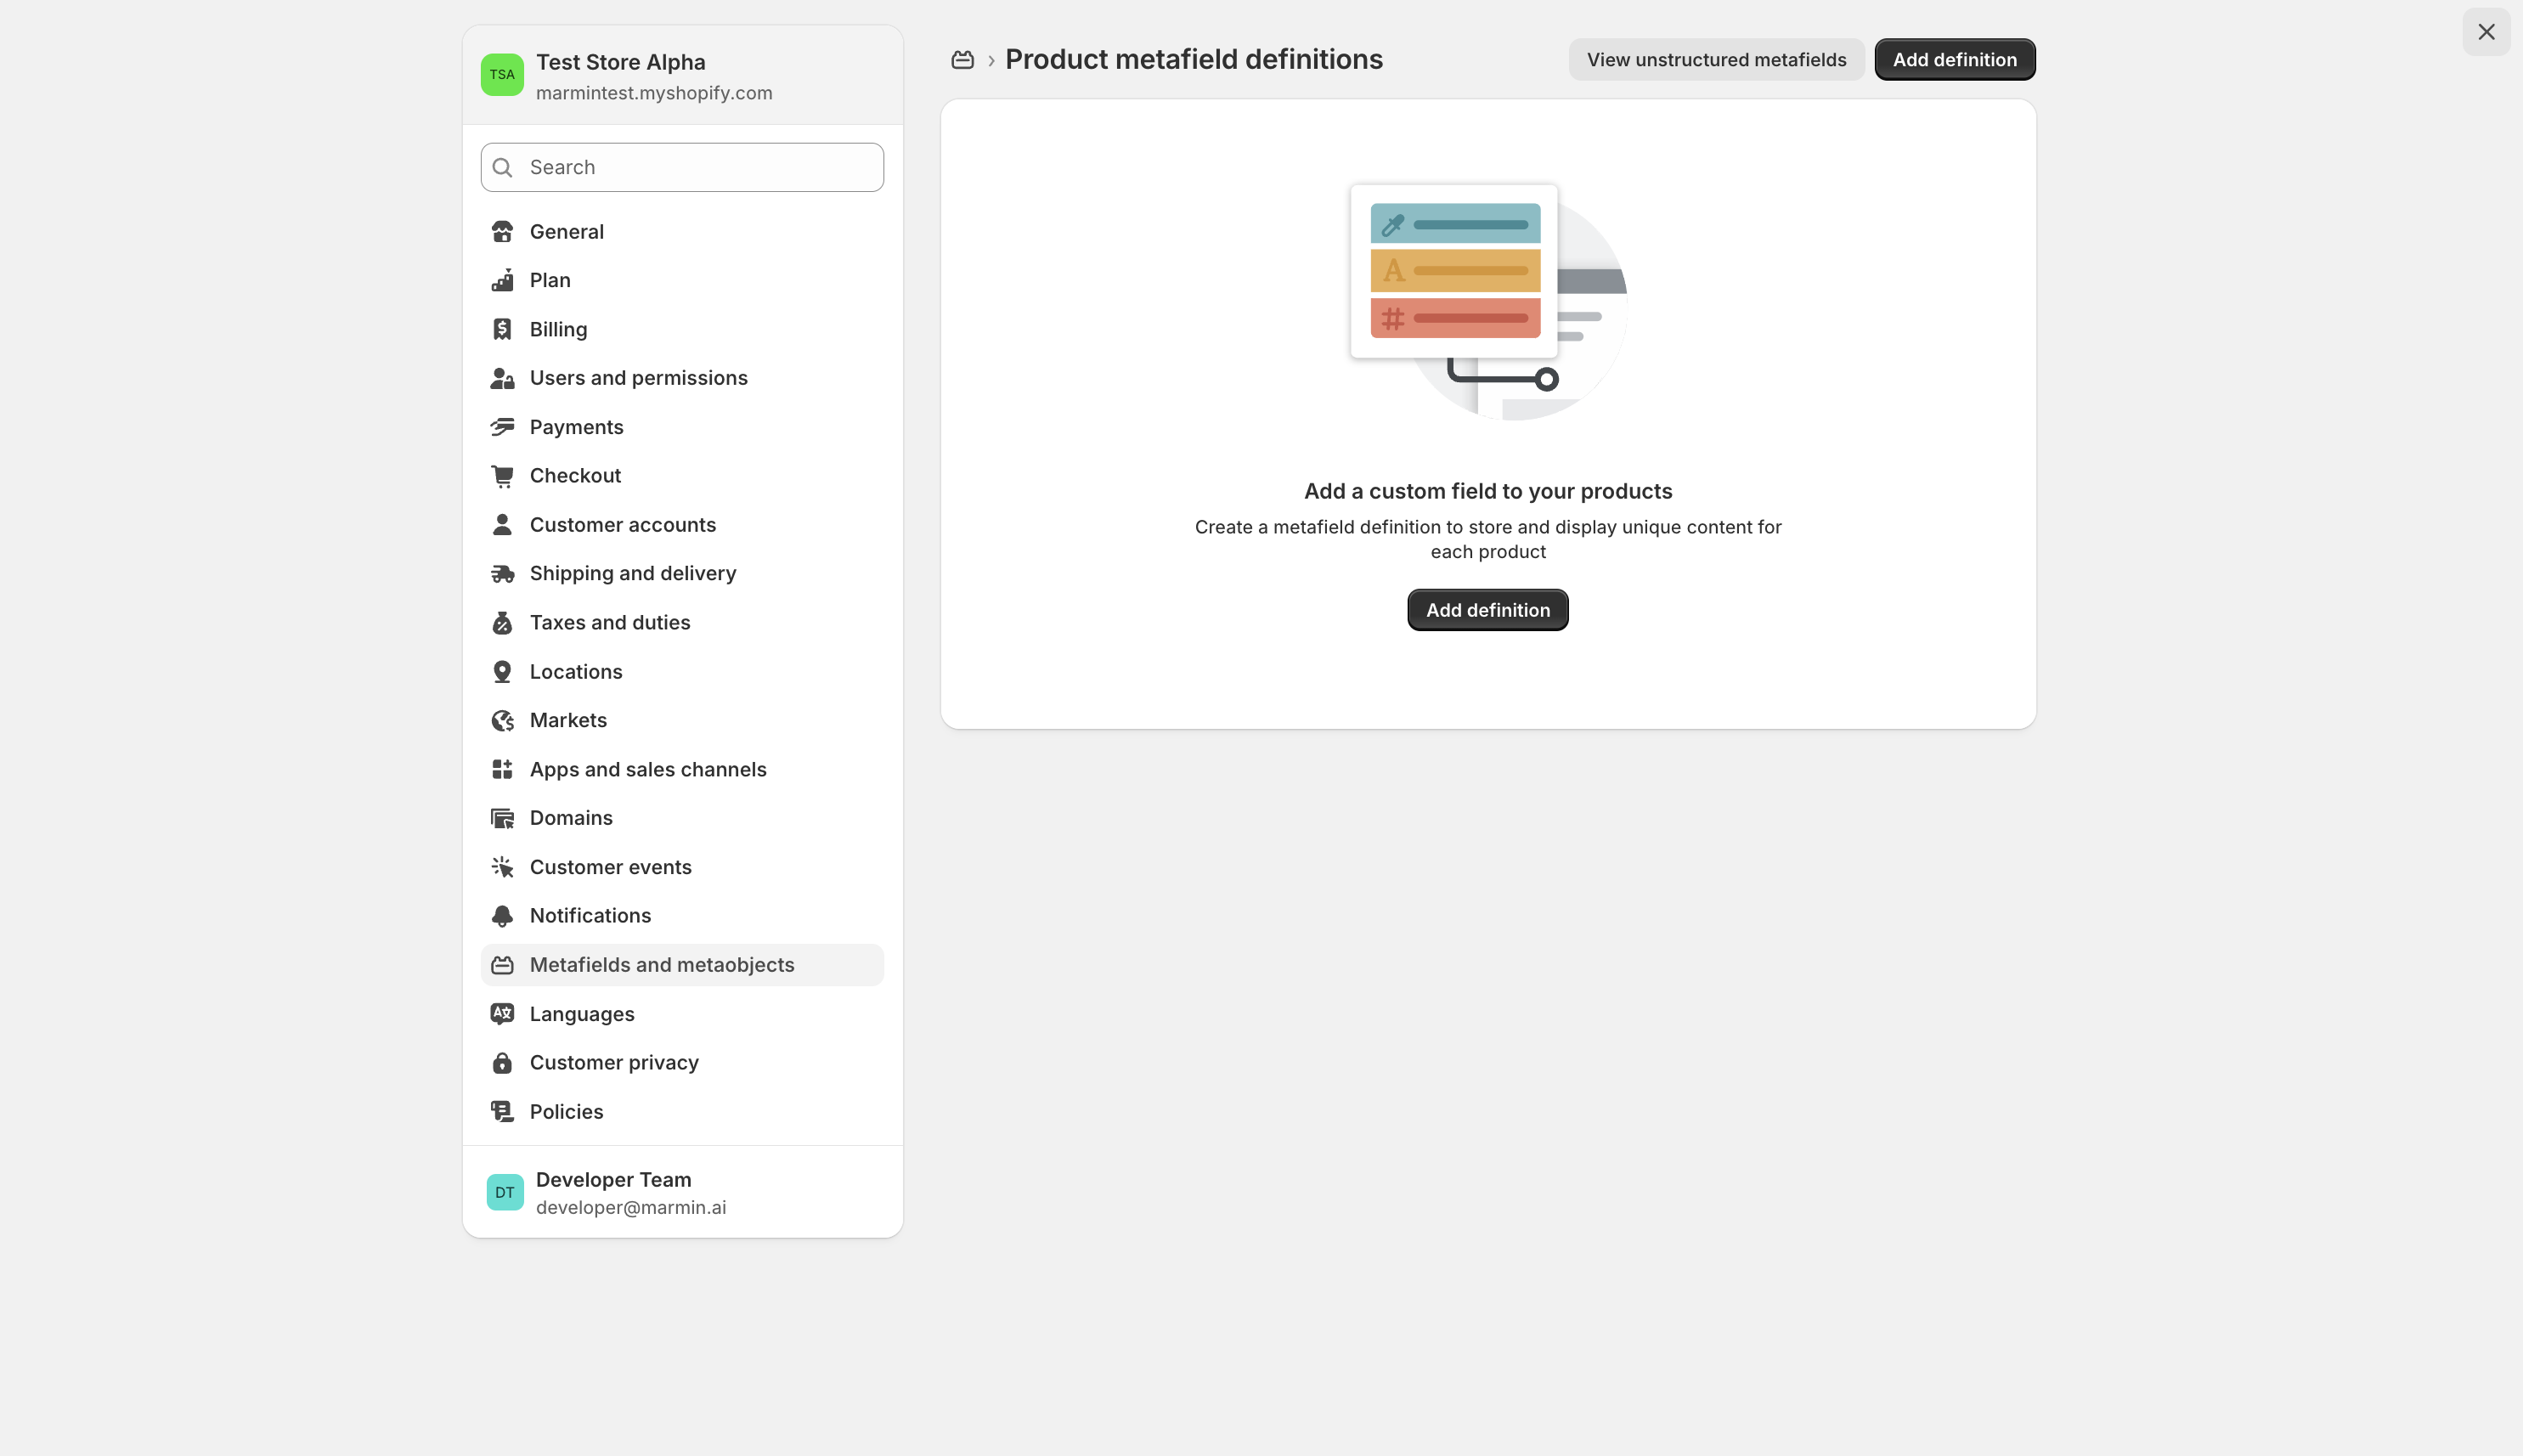
- You will land on the page to add new metafield.
- For Name, type:
Arabic Translation - The Namespace and key will automatically be generated (e.g.,
custom.arabic_translation). Remember this key, you will need it later in Marmin. - For Description, you can type:
Arabic translation for product names - Click "Select type" and choose "Single line text."
- For Name, type:
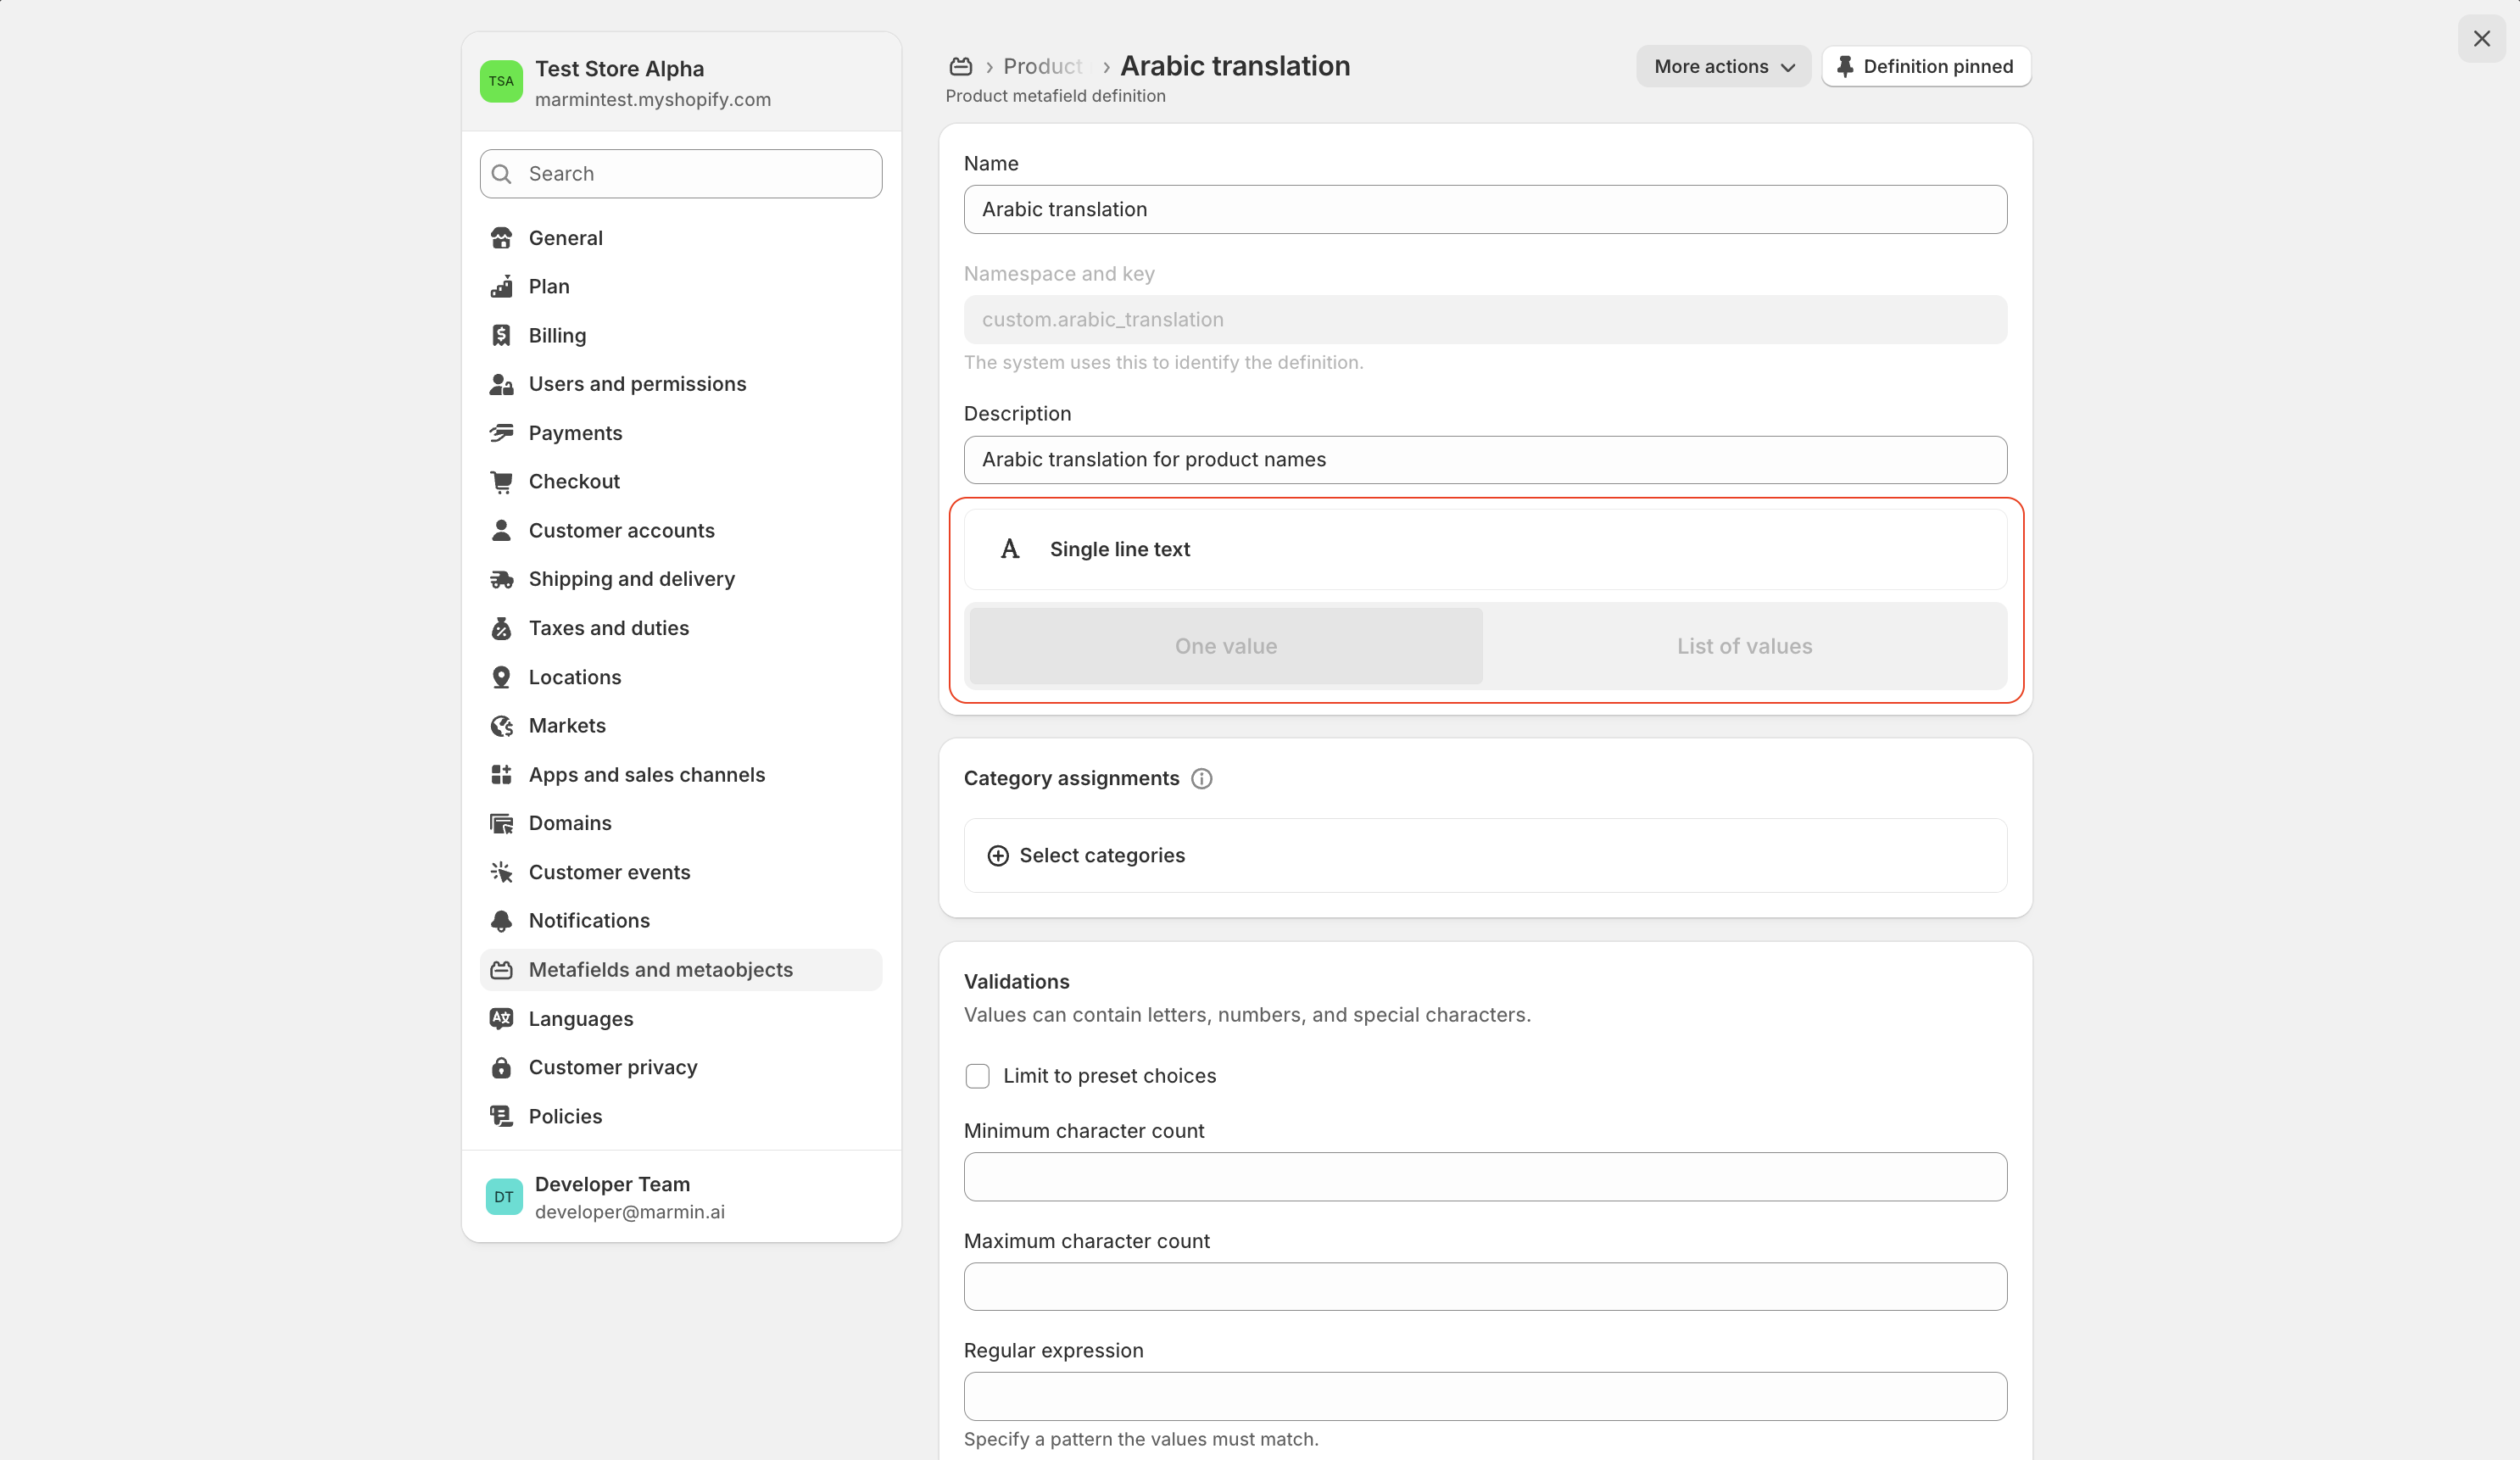
- Click "Save."
- You have now created a new custom field for your products.
¶ Step 2: Add Arabic Translation to Each Product in Shopify
Now that you have the new metafield, you need to go to each product and add its Arabic translation.
- From your Shopify admin dashboard, on the left side menu, click on "Products."

- Select and open an individual product from your list (e.g., "Toy Bus").
- Scroll down the product page until you find the "Metafields" section.
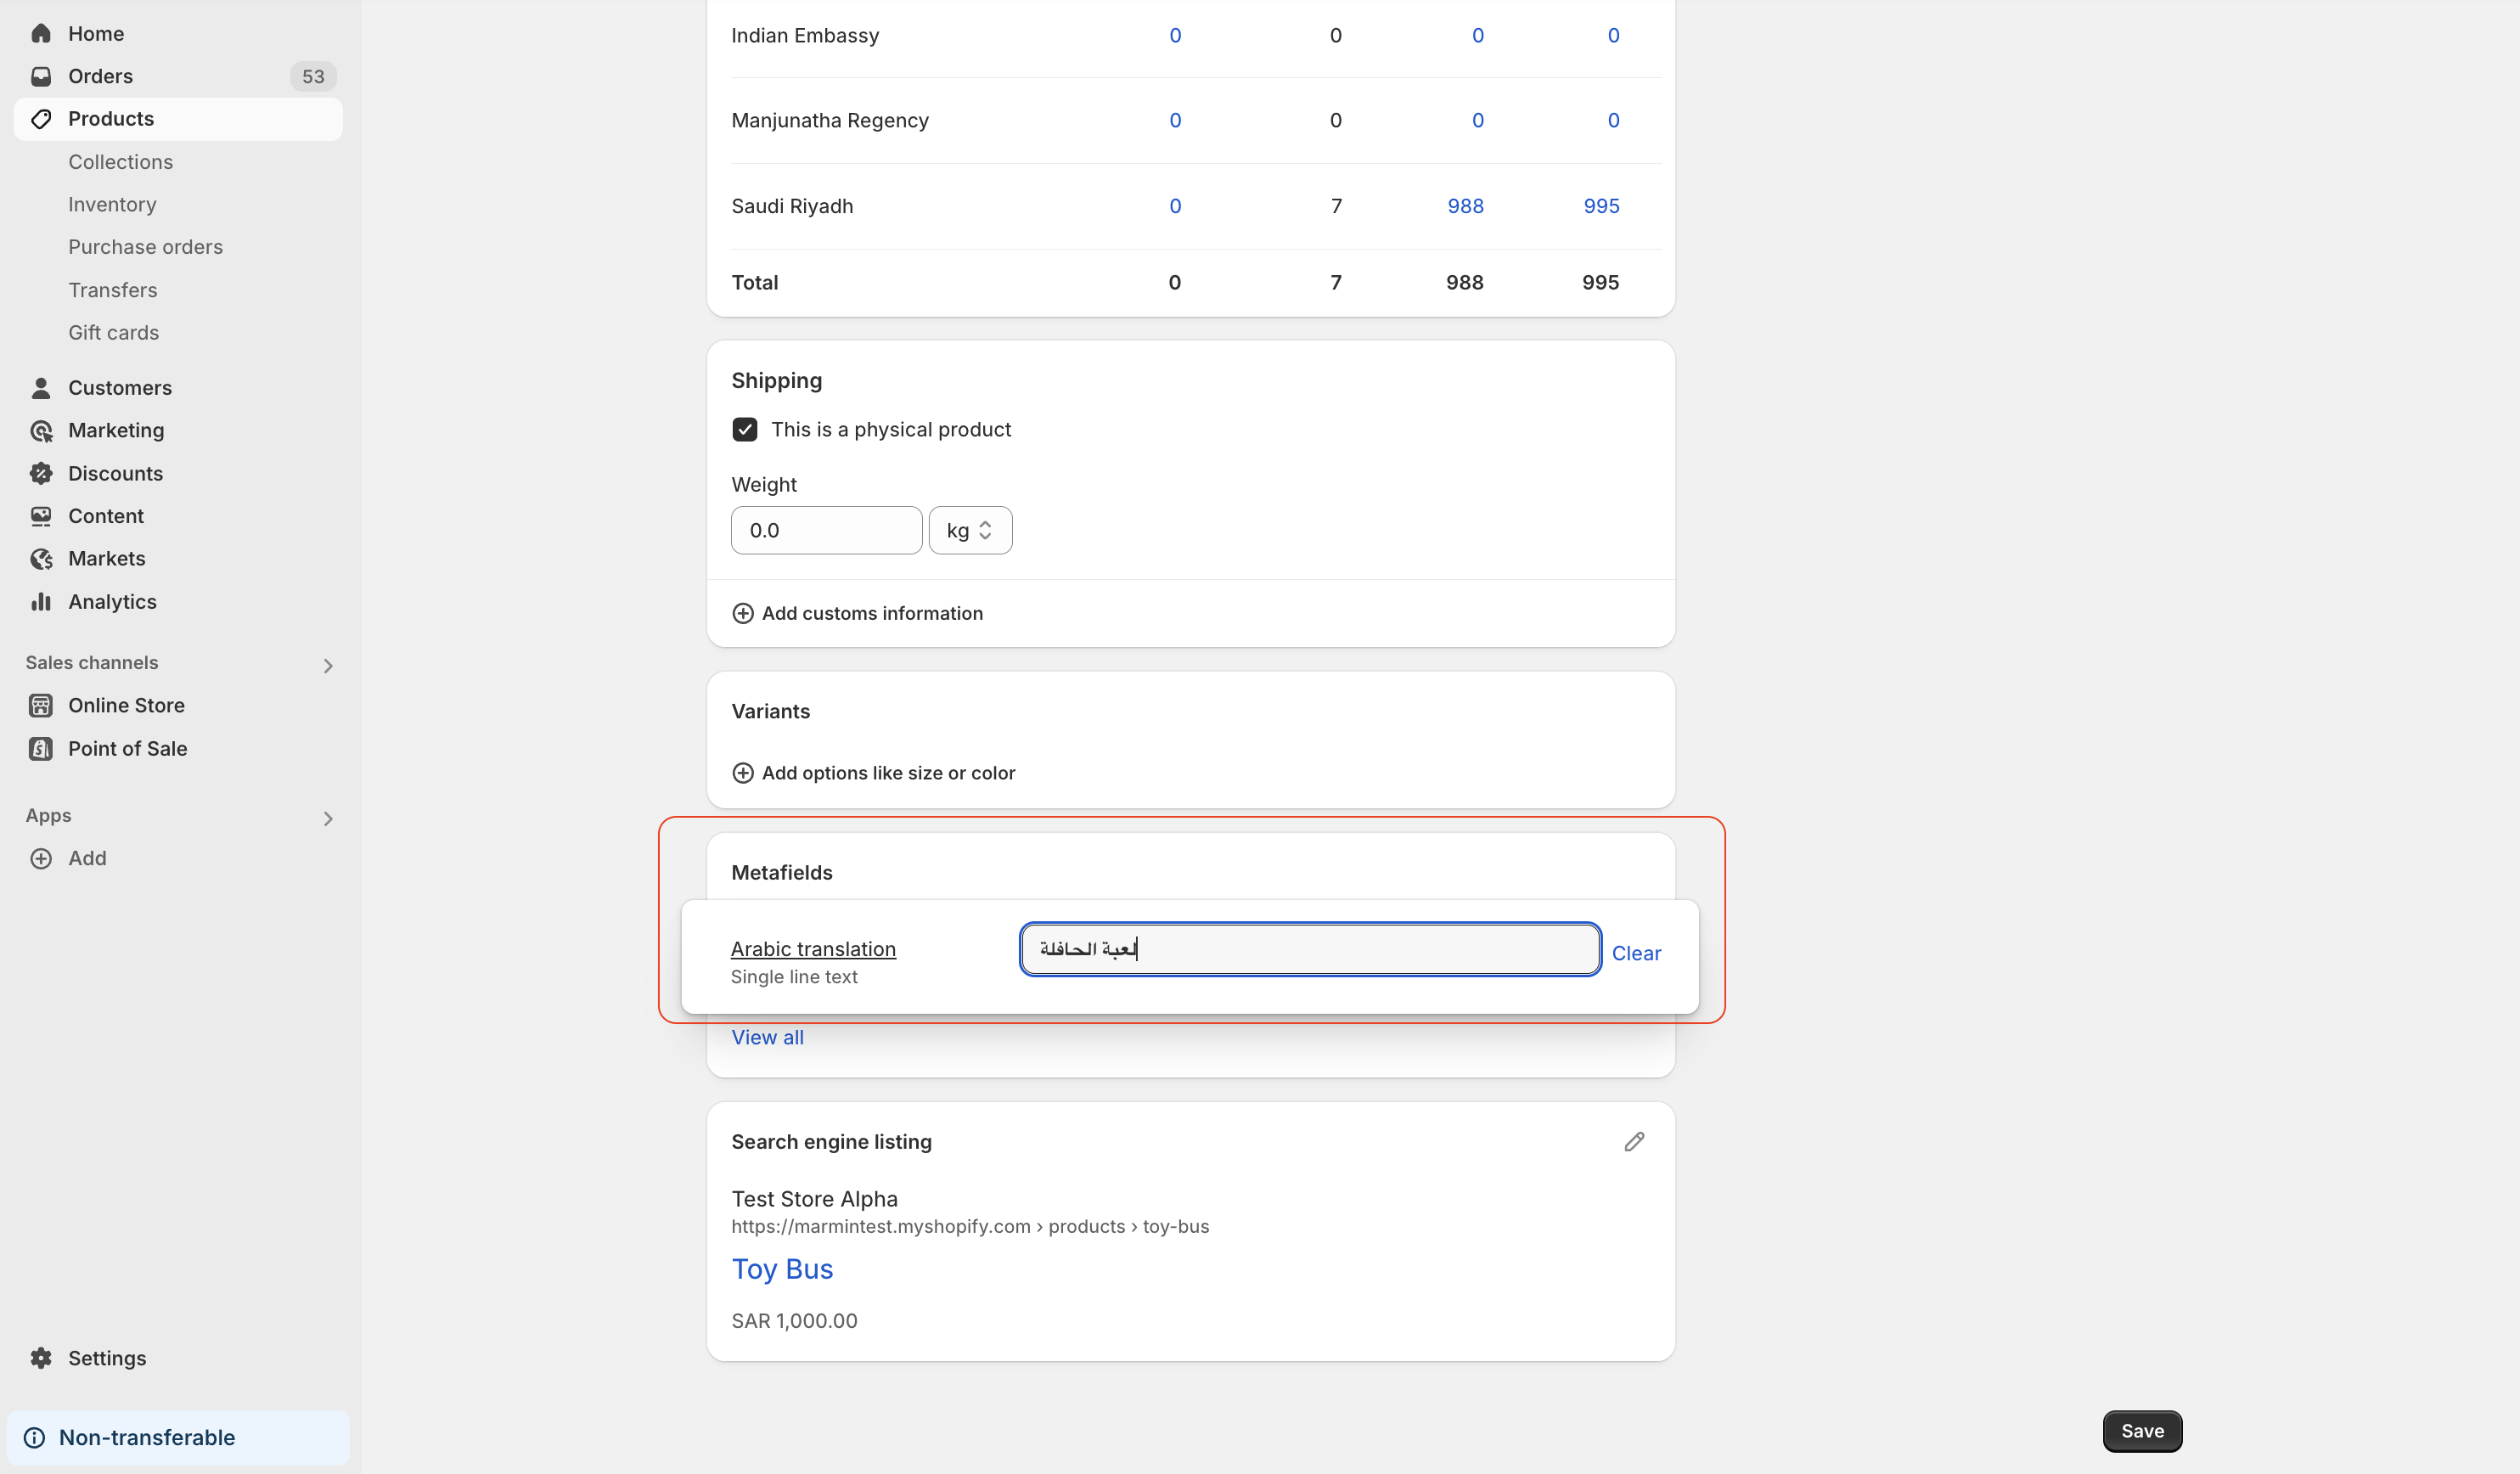
- Under "Metafields," you will now see your newly added field: "Arabic translation."
- In this field, type the Arabic translation for the product name.
- For example, if your product is "Toy Bus," you might type
باص لعبة(Toy Bus in Arabic).
- For example, if your product is "Toy Bus," you might type
- Click "Save" at the bottom right of the product page.
- Repeat this step for ALL products in your catalog that you want to have Arabic translations on your e-invoices.
¶ Step 3: Connect Shopify Metafield to Marmin
Finally, you need to tell Marmin to look for these Arabic translations when it creates an invoice.
- Log in to your Marmin account.
- On the top right corner, click on your profile and click on "Settings".
- In the "Settings" page, scroll down to the "Shopify Webhook Integration" section.
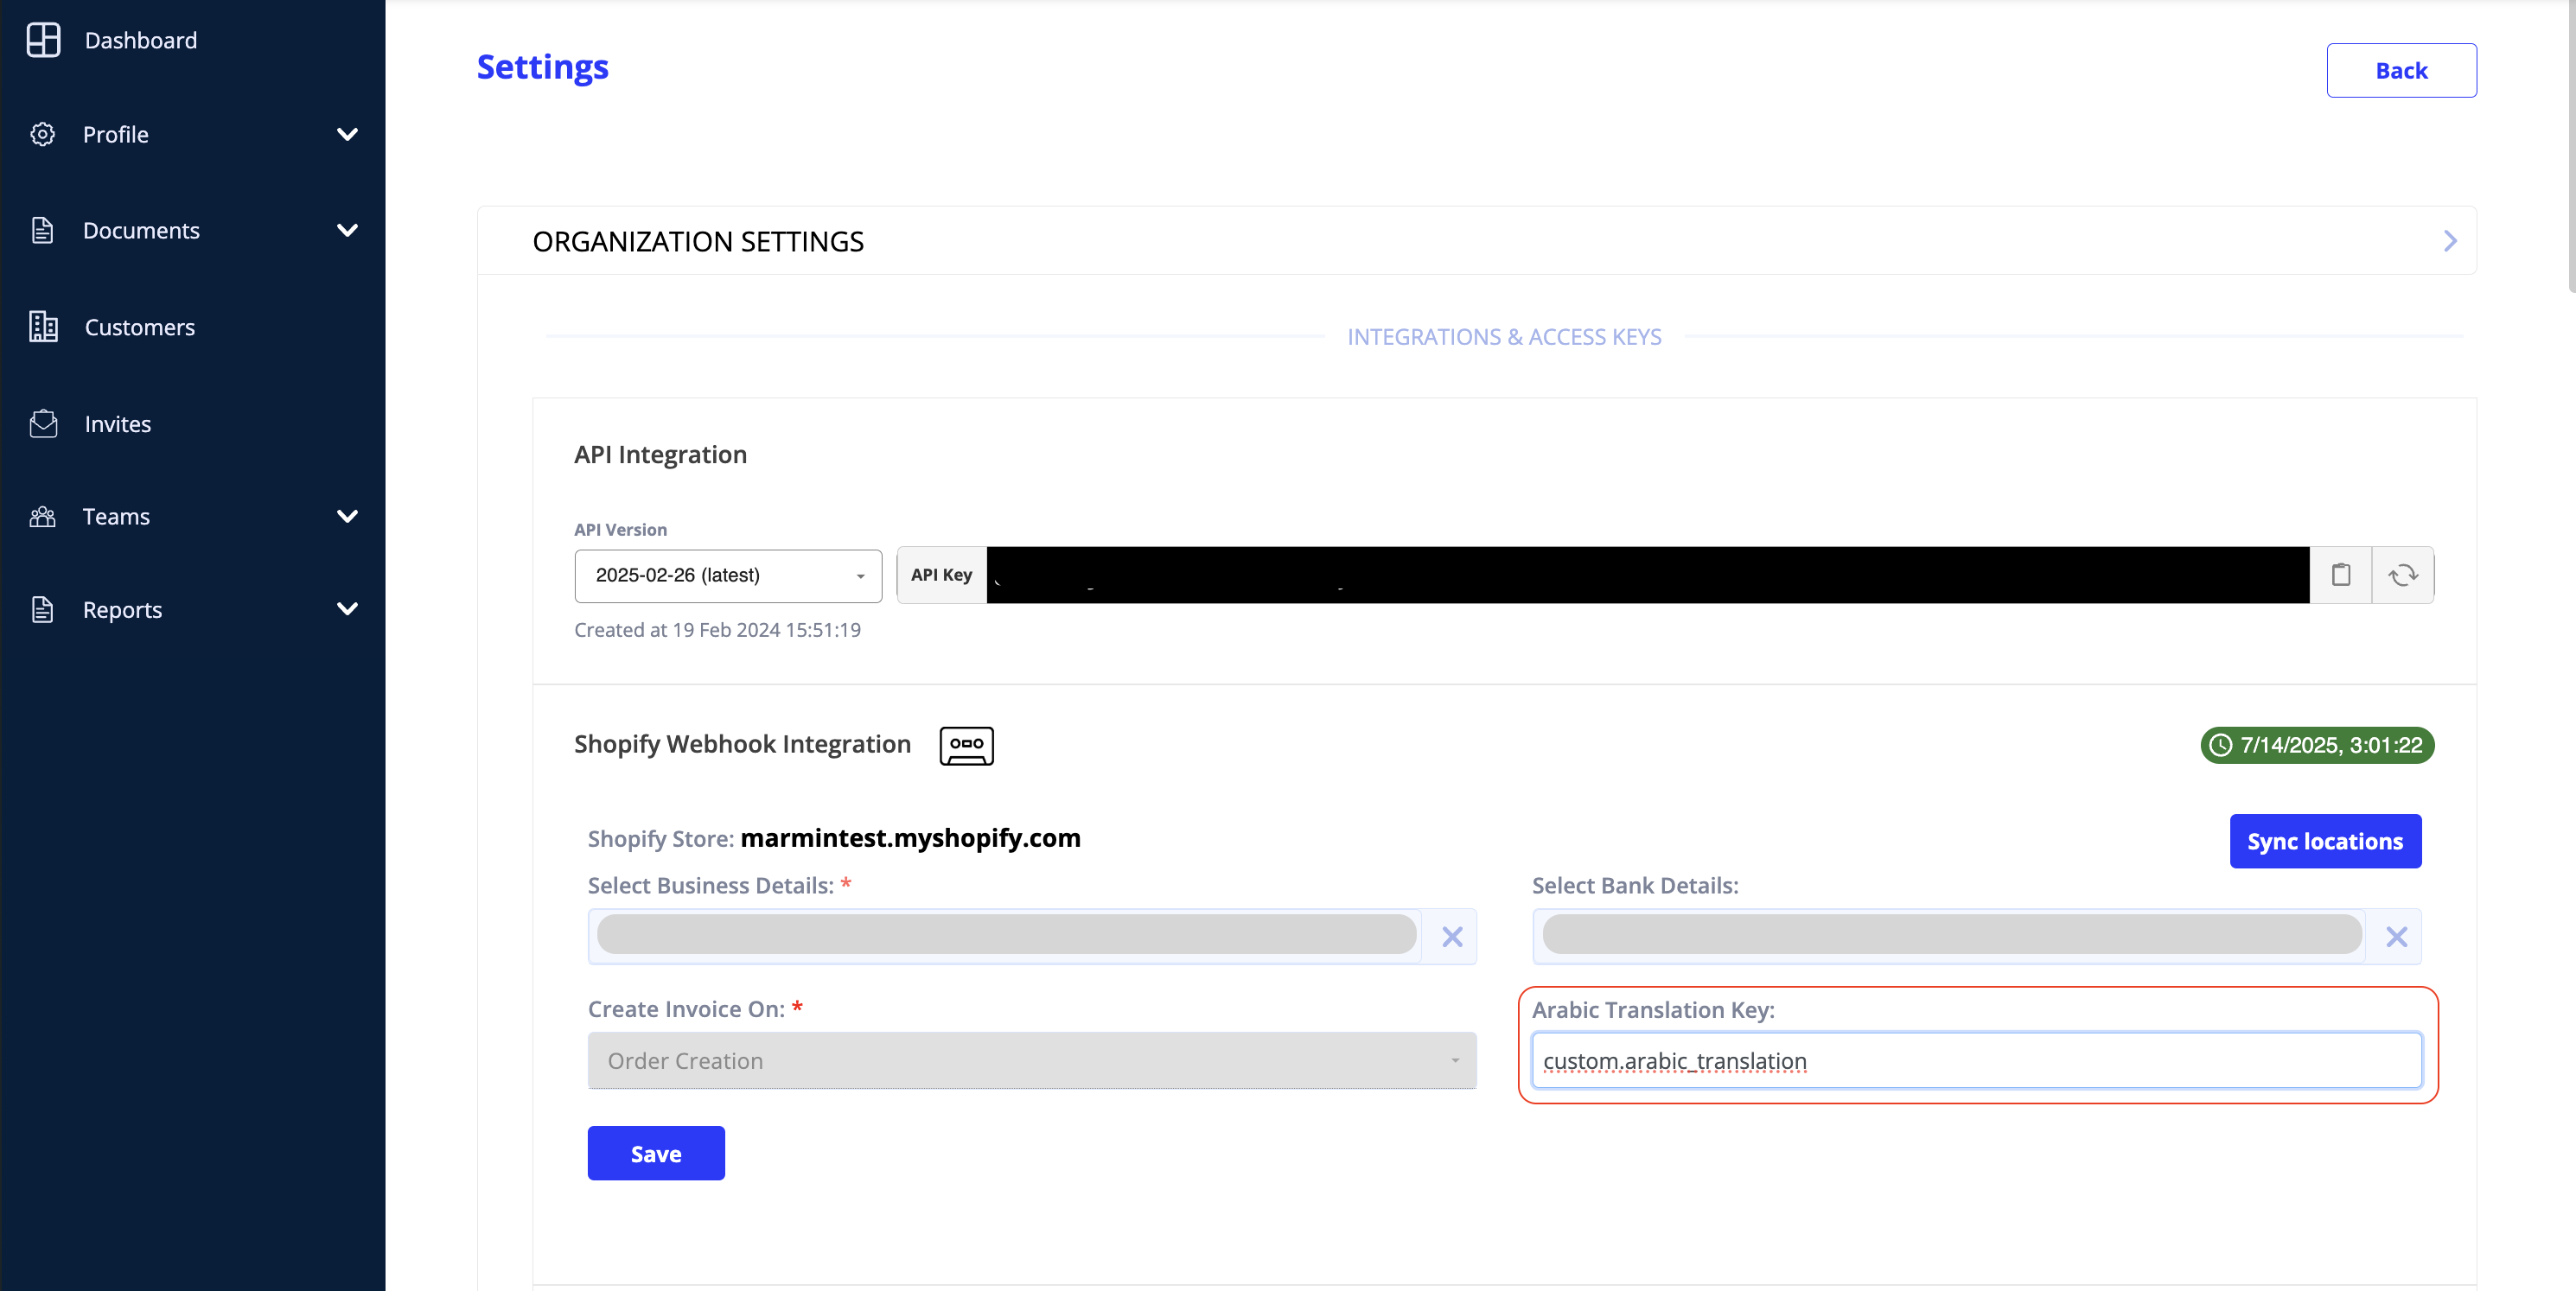
- Locate the field labeled "Arabic Translation Key."
- In this field, enter the "Namespace and key" that was generated automatically when you created the metafield in Shopify (e.g.,
custom.arabic_translation).- Make sure it is exactly the same as what you copied or noted from Shopify!
- Click the "Save" button below the Shopify Webhook Integration section.
¶ You're All Set!
With this setup, whenever you create an e-invoice through Marmin for your Saudi customers, Marmin will automatically:
- Pull the Arabic translation you entered in the Shopify metafield for each product.
- Display this Arabic translation on the invoice alongside the English text, ensuring compliance with ZATCA regulations.